[ProtoBites Part 5: ProtoPie]
Moving onto our next part of making the light to dark toggle, this article looks at creating color transitions. We’ll see how adding small details can add an extra unique quality to our toggle. If you missed the last steps, here’s the previous article.
1. Adding Colour Transitions to the Background
Adding a colour transition to our background provides the user with more feedback to their toggle interaction. Since we have the sun turning into the moon, it only seems fitting that we see our background change from light to dark and on the reverse, dark to light.
Transitioning from Light to Dark
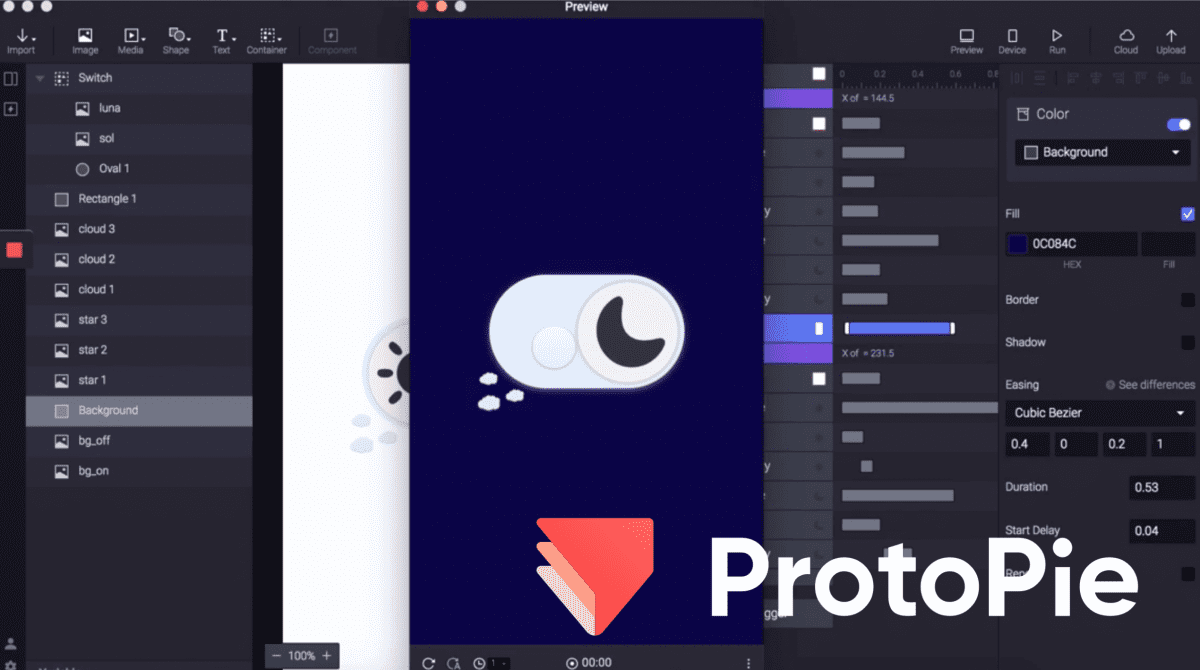
1. Start by selecting the background from the left hand panel and add the ‘Color’ condition to conditions 1.
2. Set the color to ‘#0C084C’ – this is a dark blue, but you can use any dark color you like.
3. Add the Cubic Bezier easing with the values from left to right set at 0.4, 0, 0.2 and 1. Find out more about the animation a Cubic Bezier creates over here, and create your own values.
4. Since we have added the cubic bezier effect to the forward motion of the sun turning into the moon, we want our background colour to transition slightly slower so when our moon is in it’s final position, the background will reach full opacity. We can do this by setting the duration to around 0.5.
5. As we don’t want the transition to happen immediately, it’s also important to add a small start delay. I’ve used 0.04.

Going from Dark to Light
1. On the reverse action, the background colour needs to return to the previous colour. Under conditions 2, add a new ‘Color’ condition with the color set to a light colour. I’ve used ‘#F3F8FF’.
2. As previously, add the Cubic Bezier easing with the vales from left to right set to 0.4, 0, 0.2 and 1, again with a duration of around 0.5.
A simple addition that gives more life to the toggle!

2. Changing the Colour of the Toggle Container
Since we have added the background colour transitions, it is only fitting that our stationary rectangle that the toggle button sits in changes to suit the background too.
Here are the exact steps I’ve taken to make this. Again, feel free to customise the values:
1. Select the rectangle and add the ‘Color’ condition and set the fill to ‘#4C6EF5’.
2. Add a shadow with fill ‘#00092E’. This will make the colour transition of the rectangle seem even smoother. Set the easing to ‘Ease in & out’ and to ‘cubic’.
3. Adding a duration that is slightly slower than the transition duration of the background is going to show the colour condition that has just been added. Set the duration to 0.5, and change the start delay to 0.1.
4. After this, add a ‘Color’ condition to conditions 2. Set the fill to ‘#DEECFF’ and the shadow to ‘#808080’ for the reverse.
5. Choose the ‘Ease in & Out’ for easing and set to ‘Cubic’. Then, set the duration to 0.45 and the start delay to 0.1.
3. Adding the Colour Transitions to the Oval
To complete our colour transitions, we are going to follow similar steps in the above sections. Adding a colour transition to our oval will improve the relationship between the other colour transitions.
Very much the same steps are taken to change the color of the oval. For completeness, here are the values I used:
1. Select the oval and add the ‘Color’ condition and set the color to ‘#99AEFF’.
2. Choose the ‘Ease In & Out’ easing and select ‘Cubic’. Set the duration to 0.55 and the start delay to 0.18.
3. Under the conditions 2, add another ‘Color’ condition for the reverse action. Set the color to ‘#F1F3F5’.
5. As before, set the easing to ‘Ease in & out’ and also ‘Cubic’. Set the duration to 0.48 and the start delay to 0.17.
Now that all the colour transitions are set, it is time for the finishing touches to be made to the toggle.
Thanks to ProtoPie for sponsoring this ProtoBites series.
Download the final demo file from the ProtoPie cloud and try it out.