[ProtoBites Part 1: ProtoPie]
ProtoPie 4 just launched last week, finishing Product of The Day on Product Hunt. We’ve put together a quick tutorial series to give you an overview of the brand new ProtoPie:
The introduction of this series, Elements of a Microinteraction in ProtoPie, outlined what microinteractions are, why they’re important, and how to navigate ProtoPie when creating them. So check that out first for some theory.
This tutorial is a continuation of that, showing you step-by-step how to make your own. We start by adding a Trigger to move the sun:

Step 1: Moving the Sun
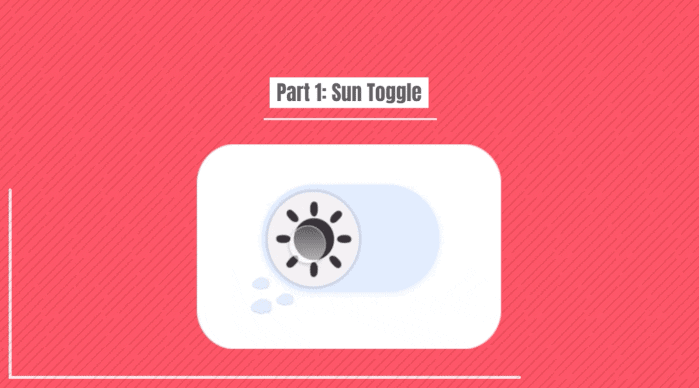
The first step will jus be to move the sun from left to right. This is our first interaction which will provide the ‘framework’ for the rest of the events that will occur when the toggle is tapped.

Step 2: Move from Left to Right
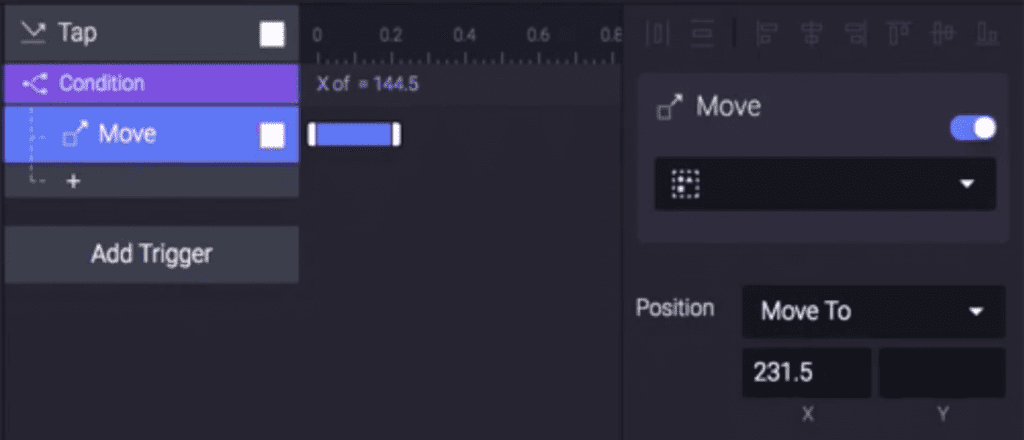
1. To move the sun, a “Trigger” must first be created. With the switch selected, add the trigger ‘Tap’:
2. Underneath the trigger, select the ‘+’ and add a “Condition”. For the condition’s properties, set the x position of the switch to 144.5. This will be the starting position of the sun, and the number is specific to our tutorial file. You can set your own if you like!

3. Following this, we need to create an event that will happen when the above is met. We want the button to move to the right. Below the condition we just created, add ‘Move’ and ensure ‘Move To’ is selected from the drop-down box. Set x to 231.5.
- Essentially what we are saying here is that if x is 144.5 when the button is tapped, the button will move to 231.5.
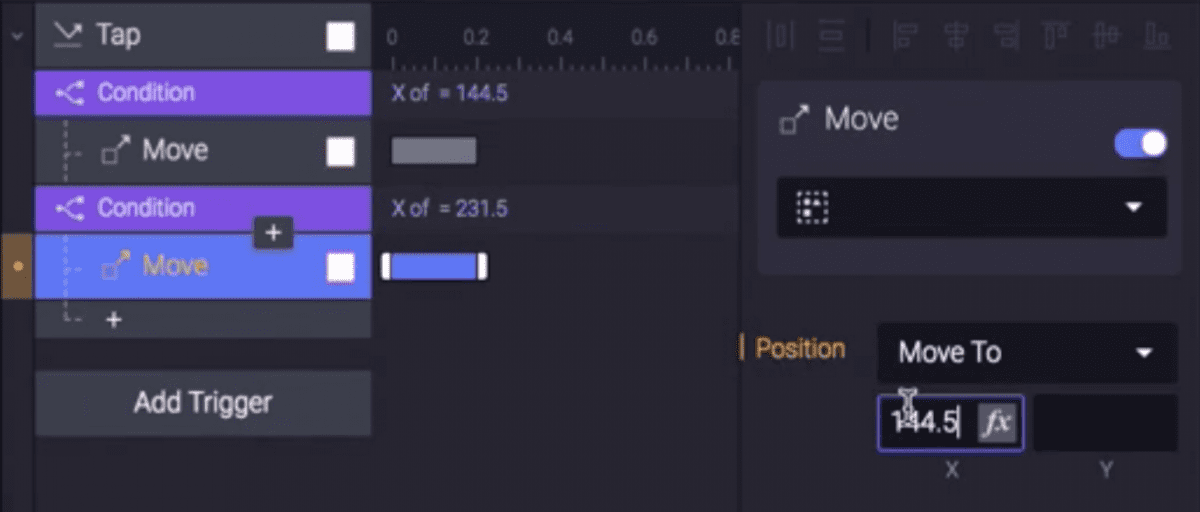
Step 3: Move back from Right to Left
1. In order for our toggle to be switched back, we need to employ the same steps but in reverse. The x position of the switch is now 231.5 and we would like the button to go back to the starting position. Underneath the condition we just made, add another condition. This time, set the x position of the switch to 231.5.
2. Similarly as before, we need to create an event that will happen when the condition is met. Add another ‘Move’ beneath the condition and ensure that ‘Move To’ is selected. Set x to 144.5.
In these 3 short steps, we have set up the basic interaction with our toggle and managed to get the sun to move. Using similar tactics, we are going to create the rest of the interaction. You are about to see a pattern forming!
Download end demo file from the ProtoPie cloud and try it out.
Thanks to ProtoPie for sponsoring this ProtoBites series.