Hi I’m Jerlyn. I’ll be doing these first series to show you how I work with Adobe XD in my daily life. I’ve done anything from wires to wedding invitations, baby reveals, animations, etc. However for this first part of the series I’m going to focus on building out a design system as my new journey as an Adobe XD Ambassador.
My favorite part of a project’s conception is the setting the design system. (I enjoy creating the color palette and font exploration the most.)
These are the steps that I take, and tools that I use when establishing a design system in creative cloud libraries.
Sometimes I start the process by using Adobe Capture (a mobile app that create production-ready color themes, patterns, vector-based shapes, 3D materials, type, and custom brushes).
This automatically adds the colors I want to the library that I choose.

However, for this example, I’ll be heading to Adobe Color.
I created an AdobeXD Library because I’ll be taking on the task to work on my branding for my AdobeXD Ambassador social networks.
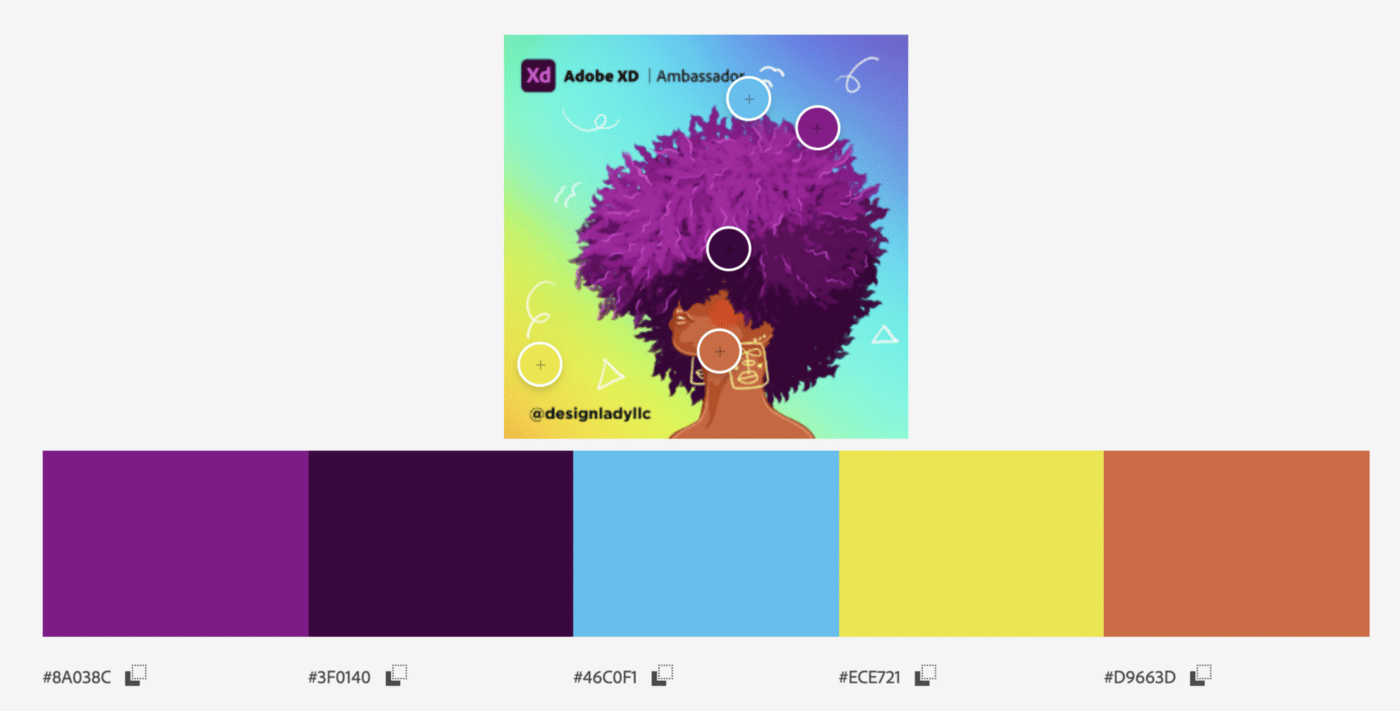
I drew an image that I like the color palette of. I went to Extract Theme and dropped it in.
I do love this color palette, I updated to use some blue (I’m from the Caribbean and I love reminiscing about the beaches). Then I navigated to the Accessibility Tools to make sure it is colorblind safe because accessibility is important to me (you’ll hear me mention the importance of Inclusive Design in most of my entries).

Now all I need to do is open my Adobe XD app and navigate to the library.
This is done by using pressing Shift+CMD+Y or selecting Libraries on the lower left of the window.

I used the color palettes on the artboards in XD and now I have the start of my design system.
I can do a great deal with this but stay tune and follow as I build this system out.
Download my XD file here. Follow me here to ensure you see how this design system evolves and see my tips on Instagram.