The ability to create and think in user flows is one of the most important skills in a UX designer’s toolkit.
What’s a user flow?
The short definition is:
A series of steps a user takes to achieve a meaningful goal.
It shows the path a user takes through the product as they complete a specific task. It has things like a title, wireframes, and notes in a flow chart. (More on this later 😄.)
Why do we make one?
What’s the benefit of adding user flows to our process? Here are five important benefits:
👩🏻💻 Increases our awareness of the user
When you’re in the weeds of designing, it’s easy to get lost in project requirements, technical jargon, and personal opinions. By the end, the user isn’t even part of the conversation.
Since a user flow is from the perspective of the user, it keeps us grounded in the fact that we’re designing a real life situation for another human being.
🎯 Helps us focus on the user’s tasks
Whenever a user pulls up a digital product, there’s always a reason they’re there: a task they need to complete. It could be finding a video, buying a flamethrower, or booking a flight; but whatever it is, _that task is the root of all their interaction_.
User flows are all about tasks, so they help us center our work on the user and their actual goals and experience, rather than fixating on one page at a time.
🧱 Sets a foundation for other work
Since user flows are broken up exactly how a user interacts the product—one task at a time—they provide a foundation for the rest of the design process.
User flows influence everything from interface design to information architecture to usability testing.
🚧 Supports troubleshooting
Lots of the issues (read: support requests) with digital products are about a user not being able to complete a task.
A clearly defined user flow helps us spot and eliminate dead ends, pain points, or confusing steps where users are having trouble.
👥 Improves team communication
Sometimes it can be challenging to get our ideas across in an accurate and understandable way.
User flows clarify the scope, complexities, paths, and goals of our designs for people like engineers, other designers, and product managers.
Great, and how do we make a user flow?
What does it actually look like and what are the steps for making one?
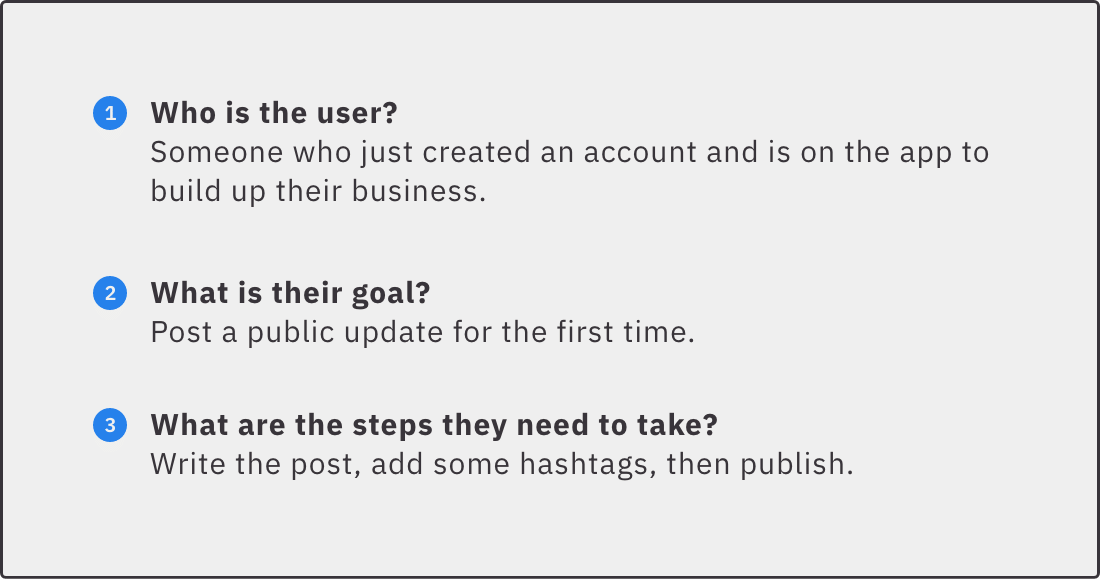
Let’s use a simple example. We’ll create a user flow for publishing a new post on a fictional social media app.
Gather preliminary info
To make the whole process smoother, we’ll need to figure out three key pieces of information before we start drawing out the flow.
Note: This is all centered around the user, so understanding who they are is crucial. Our work should be based on research and is often tied to a specific user persona.
Give it a title
Start by giving the flow a name that describes its purpose: the goal of your user.
We’ll keep the scope of this user flow to a complete representation of that one task. If our flow only covers half a task or tries to cover multiple tasks at once, it won’t serve its purpose.

Stick to one direction, and keep it simple
User flows work so well because they tell a story to the reader. To clarify that story, we’ll need to keep things focused and clear, and only go in one direction.
If it’s getting long, or branches off in a bunch of different directions, you can split it up into several smaller, distinct tasks.

Draw out each step
So what do we show on each step of the flow? It can be anything from a few words in some boxes up to fully-designed interfaces.
I prefer wireframes: they’re better than text because they give a clearer picture of the user’s experience, and they’re faster to create and iterate with than a full interface mockup. We’ll want to keep the conversation focused on the flow, anyway, not the minor details of the UI.

Include some explanation
Add a short description for each step. Explain what’s happening, and if necessary include the _whys_ behind what the user needs to do.
This is a visual chart, though, so make it quick and focused on the user’s perspective. Aim for just one sentence or phrase.

Evaluate and improve
We’ve made a flow! … Now what?
We don’t want to just make one. The whole goal is to figure out the best version of this flow for our user.
Here are some key questions to ask ourselves as we analyze our newly-create user flow:
- How can we make this flow more efficient? We want the user to get to the finish line—the completion of their task—as quickly and intuitively as possible. The fewer the steps/clicks/taps, the better, as long as it doesn’t lead to over-complicated screens.
- How can we make this flow more clear? Is it clear to the user what step they’re on, and how to get to the next one? Can we reduce unnecessary distractions? At the end of the flow do they realize they’ve completed their task?
- Are there any other areas of friction? Is the user likely to have some doubts, hesitations, or questions when they’re performing this task? Do we think this flow matches up with what the user would expect?
Side note: A/B tests are useful for determining or confirming changes.
Looking back at our example, I can see a few points where we can improve:

Now your turn!
Pick an important task from the product you’re working on and try making a user flow for it using the above guide. Let me know how it goes and if you have any questions!
🙌 Thanks for reading. If you’re feeling generous, perhaps share the thread on Twitter:
The ability to create and think in user flows is one of the most important skills in a UX designer’s toolkit.
Let’s look at how (and why) to build user flows (thread 👇) pic.twitter.com/4RCWG9zPNW
— Learn UXD (@learn_uxd) September 22, 2020

 Buy me a coffee