Build Design Systems With Penpot Components
Jul 21, 2:15 AM
Penpot's new component system for building scalable design systems, emphasizing designer-developer collaboration.
smashingmagazine.com

Framer – Medium | Tess Gadd

Building the next big video streaming service? Or designing a new podcast app? Chances are, you will need to use Video Layers. Like the other Framer Cheat Sheets in this series, we will look at the very basics: simple properties and commonly used patterns. This was written for people like me — who don’t write code for a living, but are pretty darn good at copy and pasting.
So let’s get right to it, shall we?
This Cheat Sheet contains:
A VideoLayer is an extension of a regular Layer in that is able to play rich media. Simple enough, right? It also includes sound which is useful if you want to make a music player or something similar.
An important thing to note in regards to the video player. If you want to change the interactions of the video, you refer to the .player . For example videoName.player.pause()
You set up a VideoLayer in almost the exact same way you would a normal layer. There is only one difference: the video property.
To tell the VideoLayer what video you want it to play, you have use the videoproperty. You will also need to store the actual video file within the Framer file. You might also want to create a ‘videos’ file within your Framer file to keep things nice and neat.
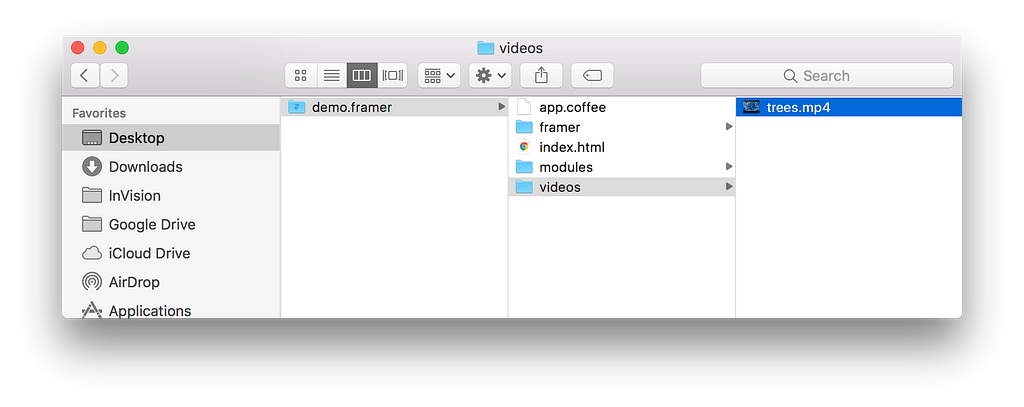
To reference the video in the framer file, you have to use a path.
videoL = new VideoLayer
   video: "videos/myVideo.mp4"
Pro Tip:
Please, for the love of all things good and holy, don’t use your 3GB HD video file. It will take forever to load and will make viewing online impossible. I use HandBreak to make most of my videos smaller — and I like it for 2 reasons: 1) it is super easy to use, 2) its free.
You can set up your VideoLayer almost exactly as you would for video — except you make the background invisible.
musicL = new VideoLayer
   video: "music/mySong.mp3"
   background: ""
Controls allow you to change your video settings. Think of your TV remote —you can stop or play your movie, you can change the volume, and you can change where you are in the movie.
As a side note — why am I using a random ass video of kaleidoscope trees? It’s because it is free to use under the Creative Comms. Don’t be accused of stealing other people’s work. That’s it really. Oh, and it has sound. Not that you hear the sounds because it’s a GIF…
By default, a video starts paused. To make it play automatically, set.player.autoplay to true . (Note: the flash of white you see in the GIF is the page load.)

videoL = new VideoLayer
   video: "videos/myVideo.mp4"
videoL.player.autoplay = true
To make the video play, use .player.play() . This will usually be trigged by a play button.

videoL = new VideoLayer
   video: "videos/myVideo.mp4"
playIcon.onClick ->
   videoL.player.play()
pause() is the opposite of play(). When you click stop, it will stop the progress of the VideoLayer. To make it pause, use .player.pause().

videoL = new VideoLayer
   video: "videos/myVideo.mp4"
pauseIcon.onClick ->
   videoL.player.pause()
This is for when you want to skip to a section and go to a specific point in the video — think “Skip Ad”. No matter how many times you click, it will jump to the same spot within the video’s progress.

videoL = new VideoLayer
   video: "videos/myVideo.mp4"
SeekIcon.onClick ->
 video.player.fastSeek(5)
Unlike Fast Seek to a Specific Time, this allows you to jump ahead in a video within your chosen interval. So if you click the seek button a couple of times, it will leap ahead in the video. To do this use .player.currentTime and your chosen interval (in this example we used 5).

videoL = new VideoLayer
   video: "videos/myVideo.mp4"
SeekIcon.onClick ->
 video.player.fastSeek(video.player.currentTime + 5)
Most videos and music players need some sort of volume control. In Framer, the lowest volume is 0 and the max is 1. To set the volume from the beginning, do the following:
videoL = new VideoLayer
   video: "myVideo.mp4"
videoL.player.volume = 0.5
Now we need to create a volume slider to allow the user to change the volume. Remember that a slider’s default min and max values are 0 and 1 — just like volume.
startingVolume = 0.5
videoL = new VideoLayer
   video: "myVideo.mp4"
videoL.player.volume = startingVolume
volumeSlider = new SliderComponent
   value: startingVolume
volumeSlider.knob.onMove ->
  videoL.player.volume = volumeSlider.value
A subtle change with most volume controls is that the little speaker icon changes too. When there is no sound, there is a little cross or strike through the speaker, when the volume is high there are more sound lines coming from the speaker.
In Design mode, use the built-in icons to place three different icons on top of each other and label them differently. I used volumeNone, volumeLow and volumeHigh.
In this example, I want volumeNone to be displayed when volume is 0, volumeLow to be displayed between 0 and 0.6, and volumeHigh to be displayed between 0.6 and 1.
startingVolume = 0.5
videoL = new VideoLayer
   video: "myVideo.mp4"
videoL.player.volume = startingVolume
volumeSlider = new SliderComponent
   value: startingVolume
volumeS.knob.onMove ->
  videoL.player.volume = volumeS.value
  volumeIconPicker()
volumeIconPicker = ->
if volumeSlider.value is 0
    volumeNone.visible = true
    volumeLow.visible = false
    volumeHigh.visible = false
if volumeSlider.value > 0 && volumeSlider.value < 0.6
    volumeNone.visible = false
    volumeLow.visible = true
    volumeHigh.visible = false
if volumeSlider.value > 0.6
    volumeNone.visible = false
    volumeLow.visible = false
    volumeHigh.visible = true
volumeIconPicker()
There are two steps to creating a seek bar after you have created the video. To create the slider:
seekBar = new SliderComponent
   parent: videoLayer
Continue with the following steps below to get it to work with the video.
If you look at the slab of code below — it looks far more complicated than it actually is. While you can just copy and paste it (my standard go to), it might be nice to understand what is going on here.

seekBar.onValueChange ->
   newTime = Utils.round(this.value, 1)
   currentTime = Utils.round(videoL.player.currentTime, 1)
   videoL.player.currentTime = newTime unless newTime == currentTime
Because the video’s progress is automatically updating the slider’s value, we have to check to make sure that the point we drag the knob to is different than the current progress point. So we define what the newTime and the currentTime is. We then say that we should update the video to the new time UNLESS it is the same as the current time. It’s all about avoiding weird infinite loops.
But you know, I would totes just copy and paste that bad boy ^.
The tricky part here is actually defining the event / listener. Because we are looking to see the time update, we have to create a rather unusual event. Or you could definitely just copy and paste that. We then update the seek bar’s value to reflect the current time. Again, copy and paste that shit.

Events.wrap(videoL.player).addEventListener "timeupdate", ->
 seekBar.knob.midX = seekBar.pointForValue(this.currentTime)
It should look something like this in the end.

videoL = new VideoLayer
   video: "myVideo.mp4"
seekBar = new SliderComponent
   max: 60  #if the video is a minute long
#this will update the video when you drag the knob
seekBar.onValueChange ->
   newTime = Utils.round(this.value, 1)
   currentTime = Utils.round(videoL.player.currentTime, 1)
   videoL.player.currentTime = newTime unless newTime == currentTime
#This will update the seek bar as the movie plays
Events.wrap(videoL.player).addEventListener "timeupdate", ->
 seekBar.knob.midX = seekBar.pointForValue(this.currentTime)
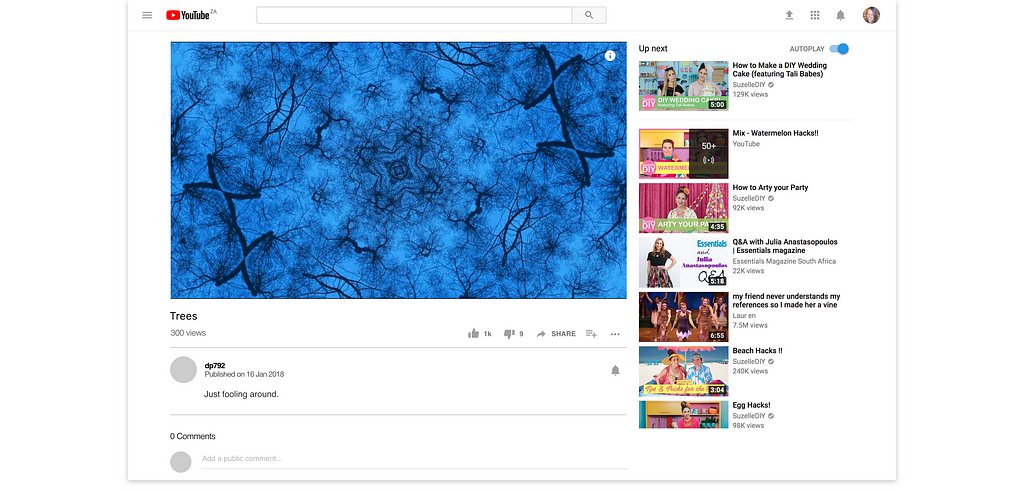
I have two examples for you, one is a mockup of YouTube and the other is a mockup of iTunes.
We all know and love YouTube (perhaps a tad too much). Here is a simple dummy prototype of one of their videos. Thanks to Framer’s Design mode — I was able to build it all on top of a screenshot.
Also — the video is bit random, but I needed something that had a free CC License. Otherwise you can’t (legally) share it😛.
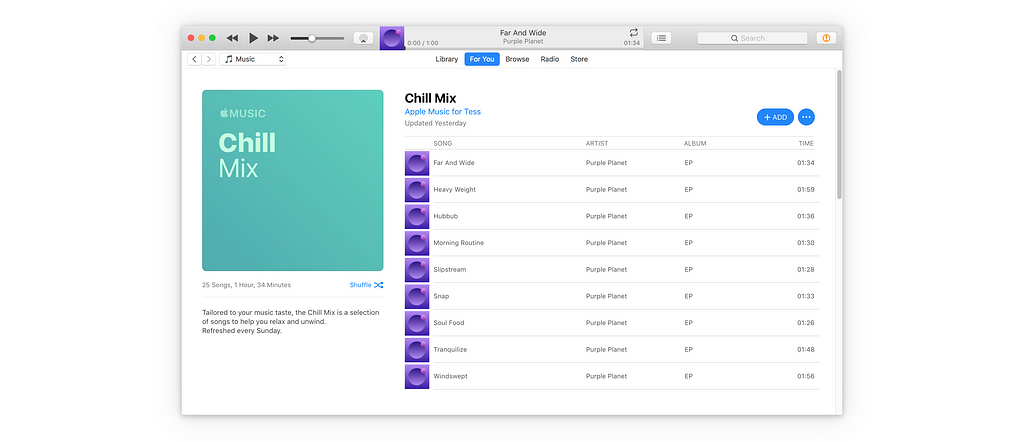
I know, I know, all the cool kids are using Spotify. I however am still firmly entrenched in iTunes. And also I would never confuse myself with being a cool kid.
Here is a simple dummy prototype of iTunes. Note that it is all designed on top of a screenshot (feel free to judge my music taste).
Also — the music is kinda random because it has to be free under a CC License to share it 😛.
Recently, this article and prototype was bought to my attention. Emin Inanc Unlu built a lovely and robust prototype (unlike mine above) that allows you to discover music much faster. Also, he is a lot cooler then me because he uses Spotify.
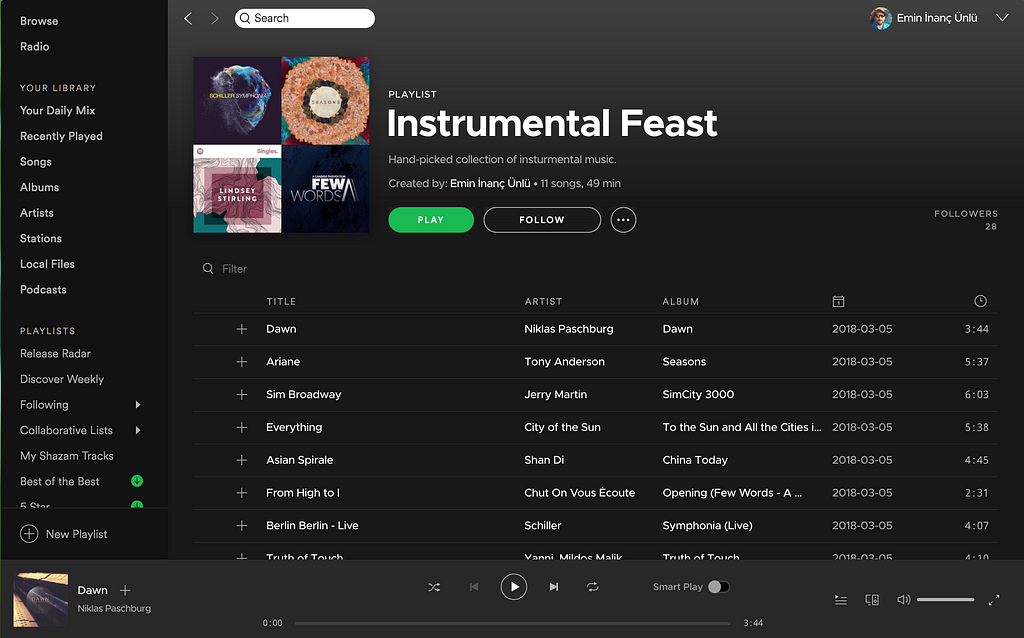 Go to https://framer.cloud/QbWIY to see Emin Inanc Unlu’s prototype.
You can read all about Emin Inanc Unlu’s process here:
Spotify Smart Play — A Case Study
This post is part of an ongoing series, find the rest of my Framer Cheat Sheets here:
As always, I love hearing your suggestions, questions and typo corrections. Please comment or leave me a note. And if this Cheat Sheet Helped, please give me a clap — my fragile ego needs it. 😛

Framer Cheat Sheet: Video Layers was originally published in Framer on Medium, where people are continuing the conversation by highlighting and responding to this story.
AI-driven updates, curated by humans and hand-edited for the Prototypr community


