<p>Google Design &mdash; Medium | Nick Butcher Photo credit: Jeremy Yap In my role as a Design Advocate at Google, I regularly give presentations on designing and building awesome Android apps. Lately I’ve been talking a lot about motion design so my presentations include a lot of videos captured from a device or fancy slide builds/transitions. [&hellip;]</p>

Breakdown

Google Design — Medium | Nick Butcher Photo credit: Jeremy Yap

In my role as a Design Advocate at Google, I regularly give presentations on designing and building awesome Android apps. Lately I’ve been talking a lot about motion design so my presentations include a lot of videos captured from a device or fancy slide builds/transitions. After presenting, I like to post my deck online, but most of the standard sharing sites don’t support motion; it’s pretty hard to talk about motion in static images!

I’ve found sharing the presentation as a Google Photos album to be a great workaround; it seamlessly switches between static (photo) and animated (video) slides. If viewers have the mobile app then they get a nice swipey fullscreen experience with looping videos.

Here’s an example:

Elevate your material design

I tend to create presentations in Keynote and there are a few gotchas to the process, so I wanted to document it in case it’s useful to anyone else (and for the next time that I need it and have forgotten all the details!).

Export

Open your keynote presentation and:

  1. File > Export To > Images… I create an image per build and export PNGs. I then go through the resulting folder, deleting any intermediary slides I don’t want, or any slides with video. Notice how keynote adds a three digit suffix for each slide/build number; we’ll need this later.
  2. For each motion slide we want to export, select all slides in the navigator except the one we want, right click and hit Skip slide.
  3. Remove any slide-level transition (otherwise the video fades at the end) then File > Export To > QuickTime… I set the next slide/build delay to 0 and the format to 1080p.

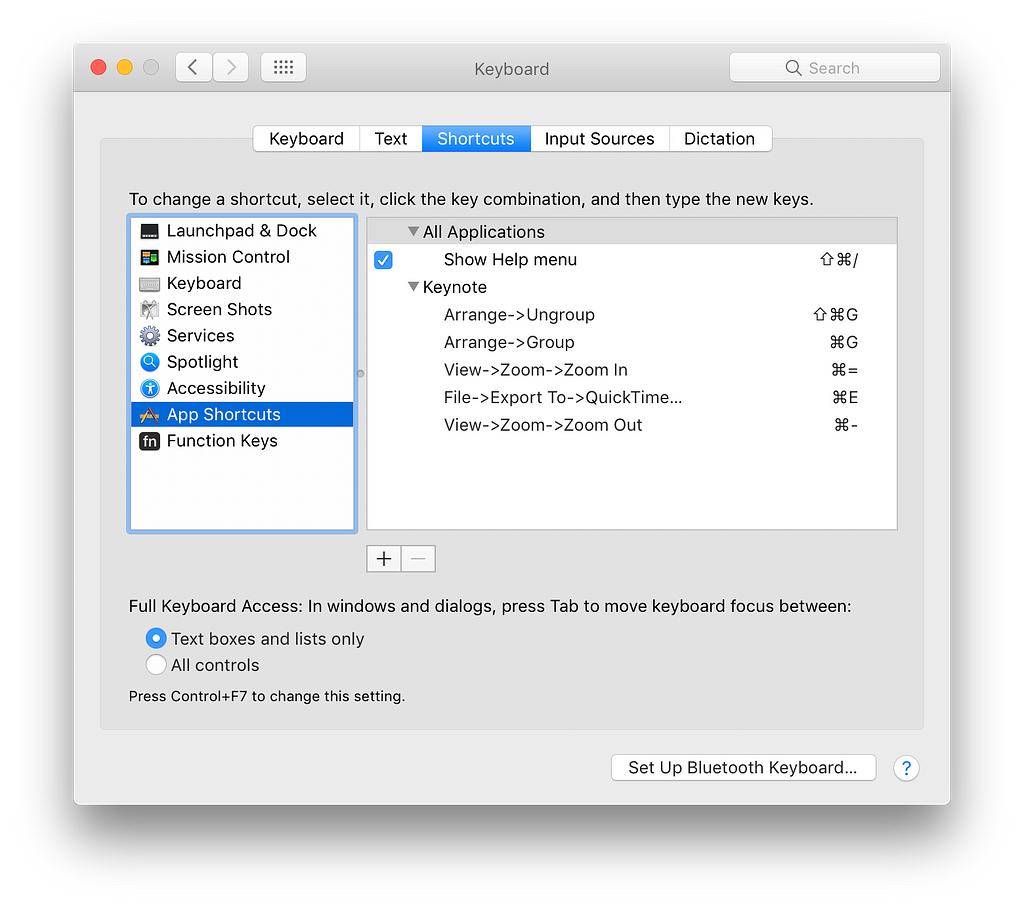
Protip: we’ll be doing this a few times so I recommend setting up a shortcut under Settings > Keyboard > Shortcuts > App Shortcuts. I map this to ⌘ + e; while you’re there I also highly recommend setting up standard shortcuts for zooming and grouping.

5. Hit next and add the appropriate suffix number so that the video appears in the right place amongst the images.

6. Hit undo twice to restore any slide transition and un-skip all other slides.

7. Repeat 3–6 for all other motion slides.

You should now have a folder of images and videos in the correct order. Before uploading, there’re a couple of other things I like to do:

Preparation

  1. Google Photos ‘helpfully’ orders your uploads by creation date (which makes sense for photos). Unfortunately our files aren’t in this order as we made the videos after the images. I run a script to alter the file timestamps to match the name order (i.e. this relies on those numbered suffixes being correct), you can find my script here. I tend to set the creation date to when I gave the presentation.
  2. The PNGs are pretty large so I run them through ImageOptim before uploading.

Upload

Our files are now ready to go. I upload them all to photos.google.com and create a new album. If our preparation has gone well then they should all be in the expected order. If not then you can manually drag them around. Then:

  1. Select the first image, hit the menu and select Use as album cover.
  2. For each slide I open up the ℹ️ panel and add speaker notes, links or any text I want to be copy-able.
  3. Go back to the album level and select Sharing options and enable sharing and turn off collaboration. I tend to disable comments, but that’s up to you. Copy the share link.
  4. [Optional] I create a bit.ly short-link as this lets me customize the url to make it more memorable and gives me some stats about clicks. Protip: all bit.ly/foo links can be written j.mp/foo to make them even shorter, which helps on services which truncate urls (like twitter).
  5. [Optional] You can then archive all of the images/videos so that they don’t pollute your photo library; they’ll remain in the album.

You can now share this link. Note that Twitter will unfurl the url and show a nice preview image of your album cover, even with the link shortener 😎:

Thanks everyone for coming to my #droidconUK talk about building beautiful meaningful motion. Slides are here: https://t.co/nosMIZKj3i

 — @crafty

Things I’ve Learned

  • I’ve tried exporting the entire presentation as a video and then chopping out the ‘slides’ I want. This was super time consuming and also produced lower quality results; I guess because it was encoded twice.
  • It’s awesome to be able to easily update an individual slide if you find a typo etc.
  • Exported images have a different numeric suffix to their slide number, I guess because of builds so don’t just use the slide number for the numeric suffix when exporting each video.
  • Viewers can’t copy/paste text from the slide. This might not be ideal but you can work around it by adding text to the description or even links to gists etc.
  • People ‘join’ the album. I’m not sure why? Maybe to bookmark it?
  • Google Photos seems to de-duplicate images, so If you repeat a slide, it might not appear. Not sure how to ‘fix’ this so I work around it by slightly altering one copy of a repeated slide.
  • Google Slides does support videos but they show player controls etc which isn’t ideal.

Conclusion

Hopefully this is helpful to someone! I’ve been really happy with the results and will keep using this approach until presentation services up their game. If you know of a service which supports motion i’d love to hear about it!

Here are some more examples of decks i’ve created with this technique:

stat?event=post.clientViewed&referrerSou


How to Create ‘Moving’ Presentations was originally published in Google Design on Medium, where people are continuing the conversation by highlighting and responding to this story.

Curated

Oct 7, 5:42 PM

Source

Tags

Tomorrow's news, today

AI-driven updates, curated by humans and hand-edited for the Prototypr community