Build Design Systems With Penpot Components
Jul 21, 2:15 AM
Penpot's new component system for building scalable design systems, emphasizing designer-developer collaboration.
smashingmagazine.com

medium bookmark / Raindrop.io |
If you have to change an icon that exists in multiple different locations in your file, what do you do? Then, what do you do when you have to slightly change one color assigned to an icon that you just spent hours fixing throughout your design?
You can make all of the above changes using Sketch in no time. Symbols are one of the most powerful features in Sketch for creating large design systems. Today, I will teach you how to use nested symbols in a very efficient way.
Nested symbols are regular symbols that are made from other symbols that already exist in Sketch. Sounds kind of like inception? It is. But not to worry – after this short tutorial, it will be a piece of cake for you to use nested symbols to save time.
Take a look at the example below. I took two simple symbols and then combined them together to make another one:

By creating a new symbol from other symbols, I have the ability to override the settings of the original symbols nested inside the new symbol.
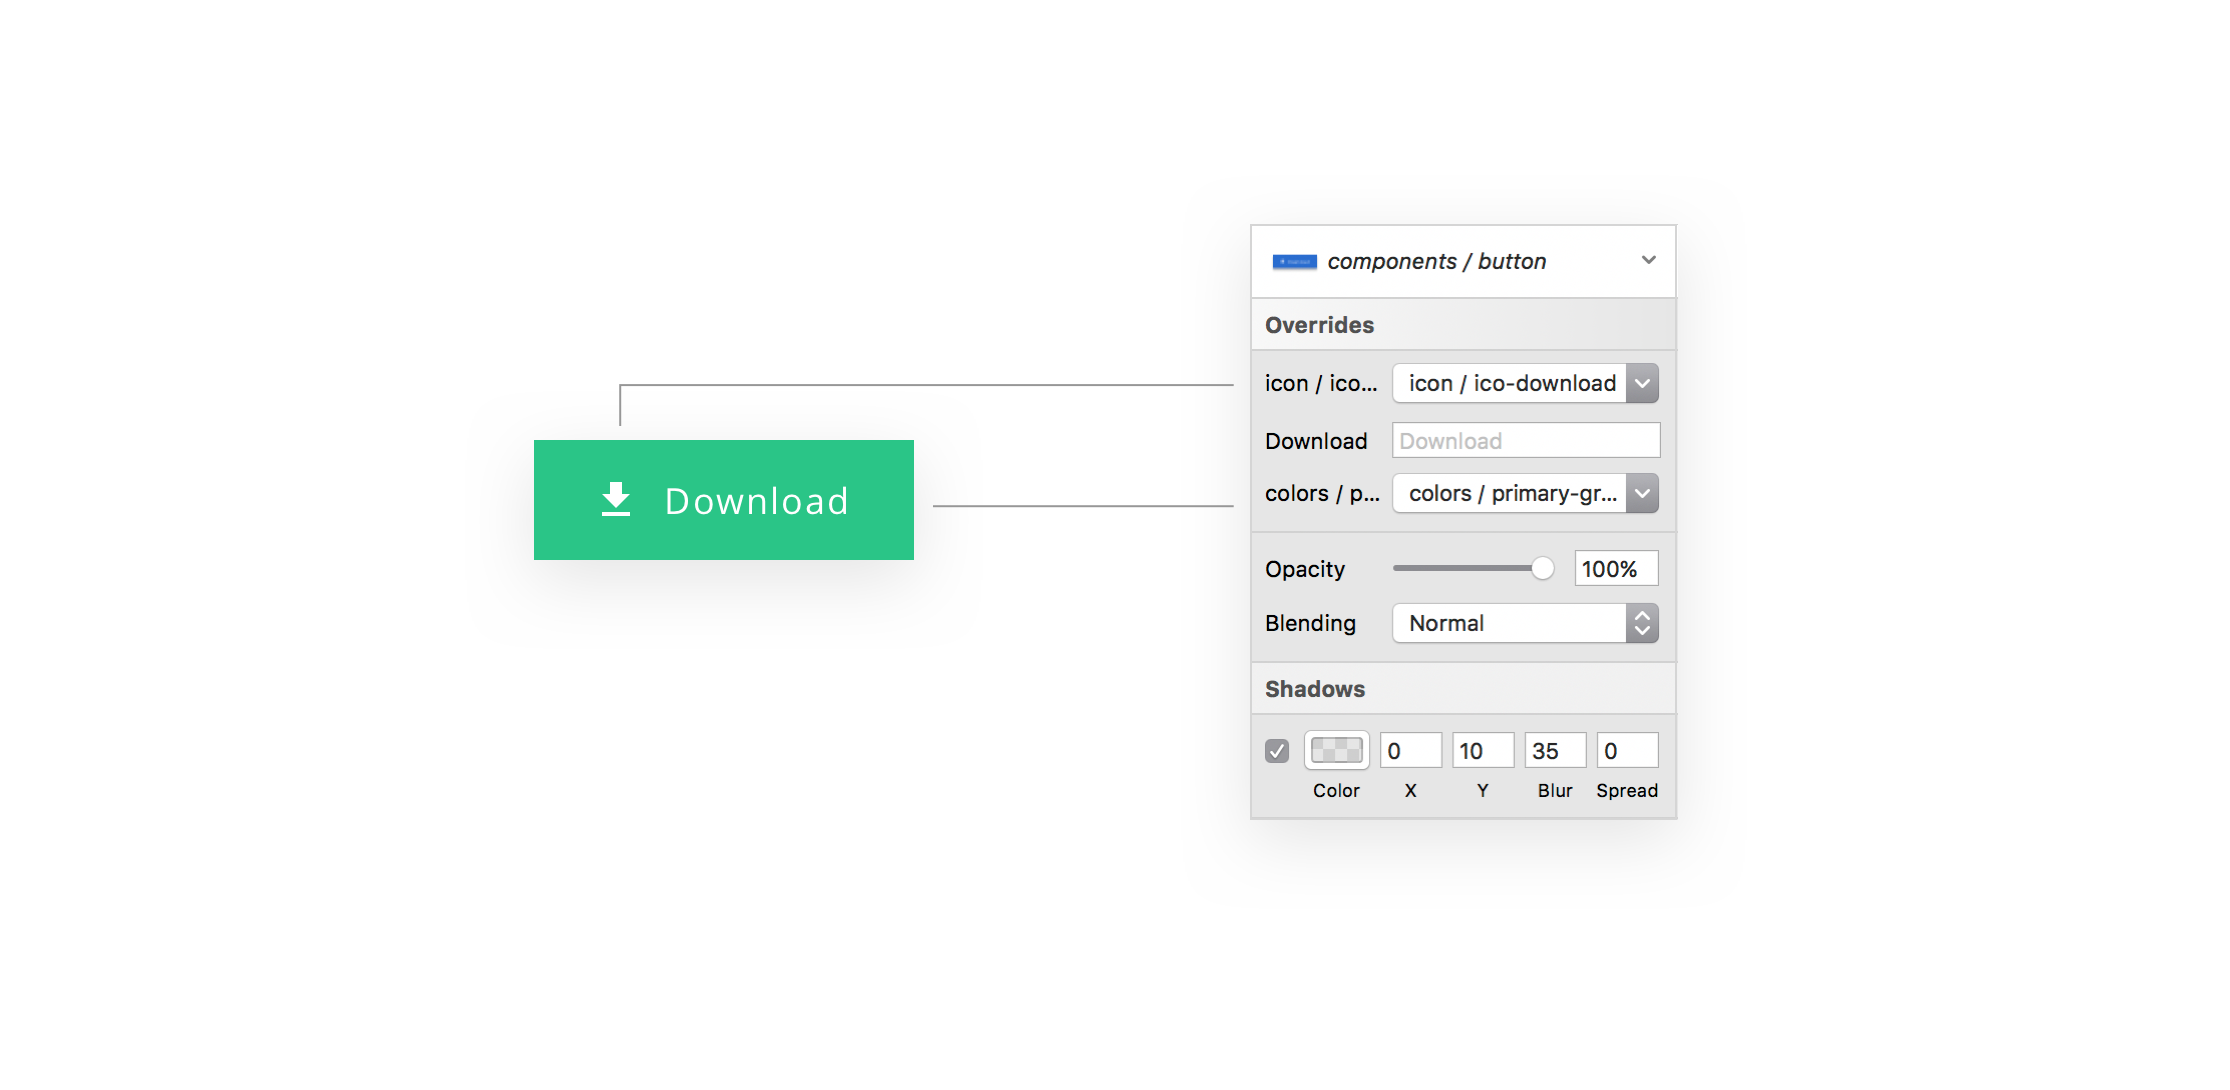
We’re going to create the button example above in order to understand the process of creating nested symbols.
Let’s start by creating some colors for our button. Create a rectangle of 100px by 100px without a border, and add blue fill to it. Name it **COLOR / PRIMARY-BLUE. **Right click this rectangle and choose “Create symbol.” Double click the rectangle to jump into the Symbols menu, then duplicate the whole symbol.
Rename the copy to **COLOR / SECONDARY-BLUE, **and change its fill to another color. You can repeat the process again to create other colors.

To create our nested symbol, we will use one more element: icons. The process is the same as it was with the colors – you create one icon, then convert it into a symbol. Then, on the Symbols menu, duplicate the whole symbol with the icon inside and give it a unique name.
Important: the artboard size of the icon symbols must be the same.

To create a nested symbol we will use the color and the icon symbols we created in steps one and two.
Start by placing the color symbol on a new artboard and transform it into the shape of a button. Add some text over it and place the icon symbol on top. Now, select all of these layers, group them, and convert this into a new symbol.

That’s it! Now you can use symbol overrides for your button to adjust it however you’d like with fewer steps.
For better clarity, you can use emojis as layer names. If you would like to know how to do that, take a look at my previous article: Using Emojis to Manage Sketch Files
Here is the final result of the nested symbol and its overrides:

Subscribe
Trending articles
Relevant Technologies
About the author

Designer
Wojciech is a product designer with 6 years of professional experience in the design field. He’s educated as an architect-engineer. Wojciech is responsible and has worked on web product design through information architecture to the user interface all the while keeping mindful of business goals.
AI-driven updates, curated by humans and hand-edited for the Prototypr community


