
Build Design Systems With Penpot Components
Jul 21, 2:15 AM
Penpot's new component system for building scalable design systems, emphasizing designer-developer collaboration.
smashingmagazine.com

Framer – Medium | Sergey Voronov 
Let say you have downloaded nice UI kit for Framer like https://learnux.io/framer/ this one for example. Or you have elements in design mode that you want to reuse several times in your prototypes once u have designed them, like buttons, elements of lists, alerts and so on.
Previously, long-bearded prototypers were doing components with code, which meant if the visual part was changed significantly — code should be changed too.
Right now we have the power of Design Tab in Framer, and despite the fact, early adopters of Framer are skeptical about it, people are doing some amazing things with it.
This sample below by Alex Manthei was done just with Framer layers in Design mode, it blew my mind:)
 https://dribbble.com/shots/3612312-Joining-Trainline
So Framer design mode allows us to validate different ideas quickly, without jumping back and forth between Framer and Sketch/Figma/Photoshop.
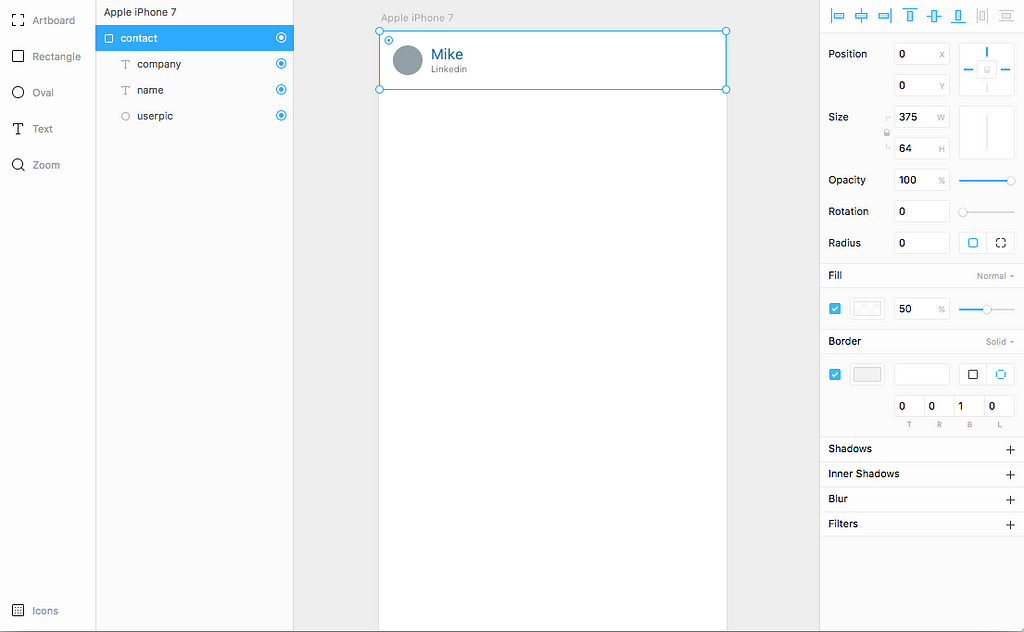
A simple thing we can do with reusing design made components is just copy object. In case we are copying parent object with several children inside — it will be copied with them also. We can apply some loop to create more copies.
Mind that in order to copy layer from design in code — you must create the target for this layer in design mode.
for i in [0..4]
 newContact=contact.copy()
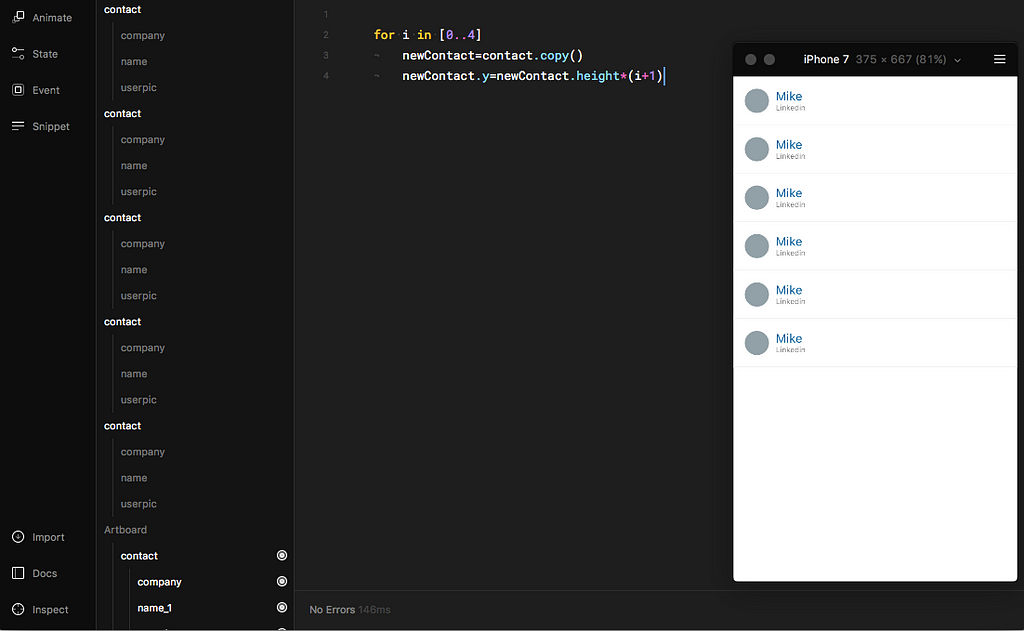
We have multiple blocks now, however, they all have the same content. We can play guess game and talk to children of our list element with index like this:
for i in [0..4]
 newContact=contact.copy()
 newContact.y=newContact.height*(i+1)
 newContact.children[1].text=i
 newContact.children[0].image=Utils.randomImage()
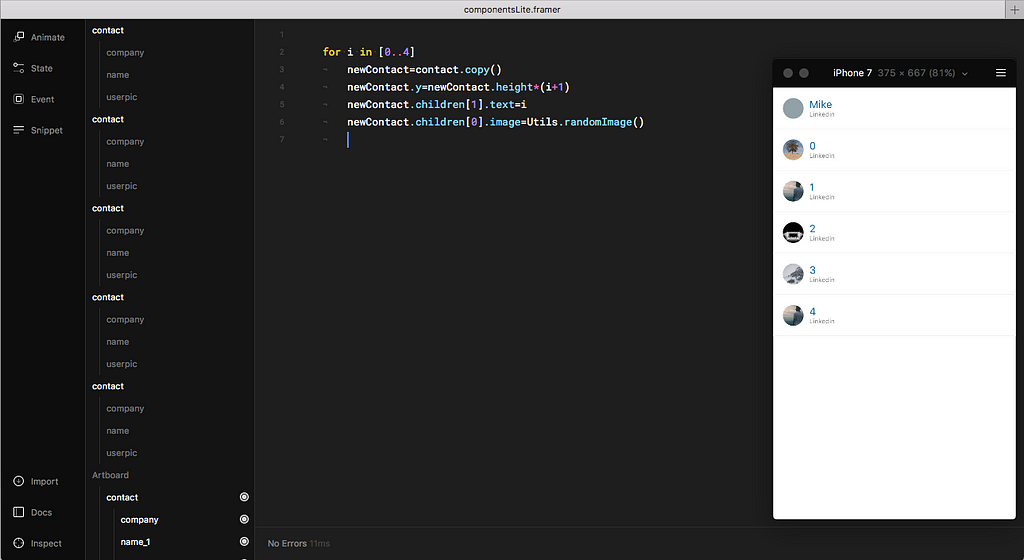
It’s closer to our needs, but if we have complex components with lots of children inside, guessing the index of children can be complicated.
Andrew Cunliffe pointed me on new things in Framer — selectors made by Andreas.
Here is the basic overview of how they work:
My “Find module” is now part of @framer! 🎉 Try this if you’ve ever used childrenWithName(). Here’s a quick cheatsheet 🙂
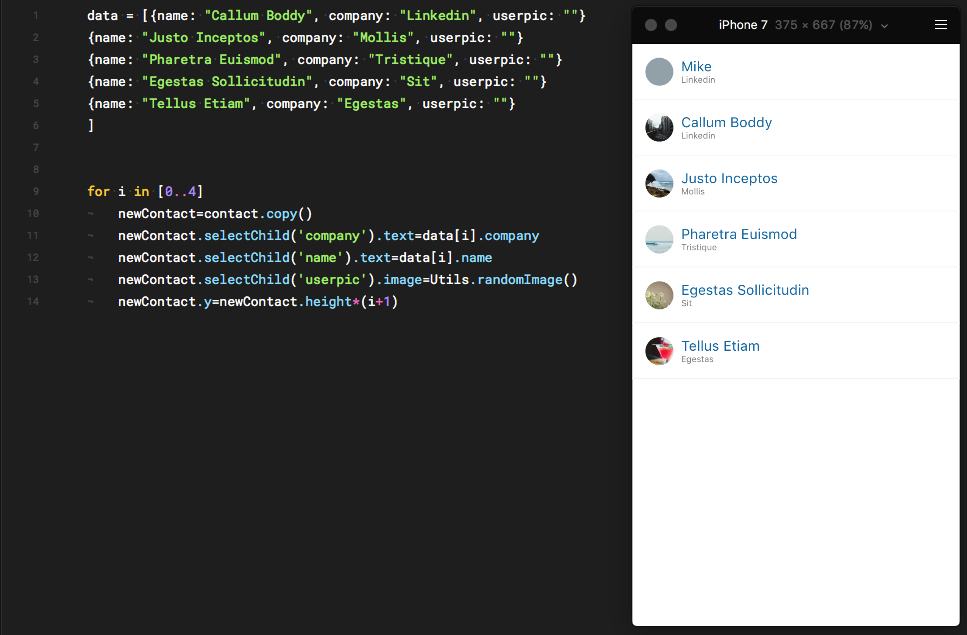
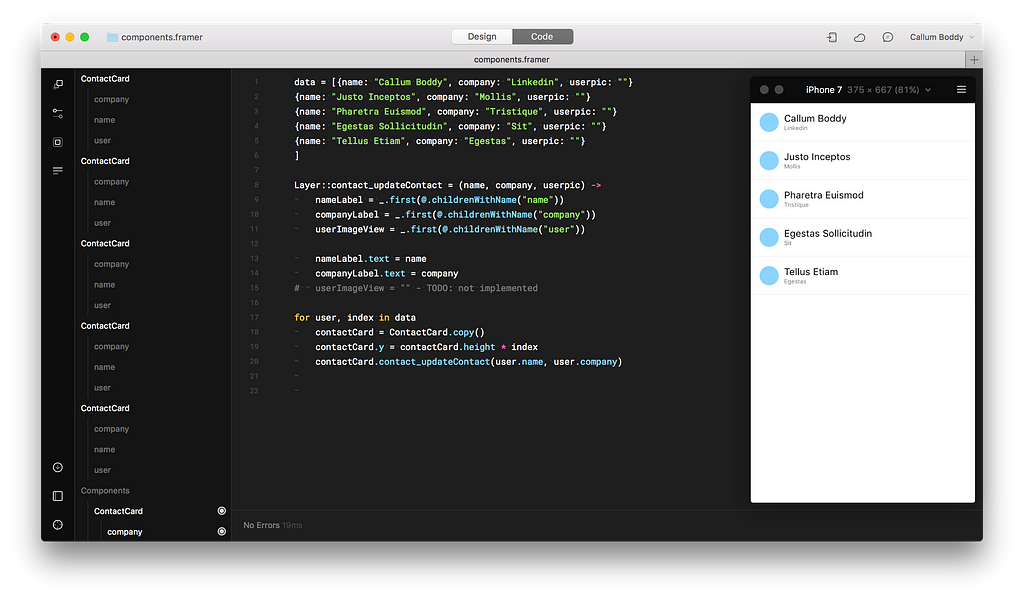
So knowing the name of the child layer, it becomes little a bit easier to change properties of it. I am using some dummy JSON data to put life in our prototype.
data = [{name: “Callum Boddy”, company: “Linkedin”, userpic: “”}
{name: “Justo Inceptos”, company: “Mollis”, userpic: “”}
{name: “Pharetra Euismod”, company: “Tristique”, userpic: “”}
{name: “Egestas Sollicitudin”, company: “Sit”, userpic: “”}
{name: “Tellus Etiam”, company: “Egestas”, userpic: “”}
]
for i in [0..4]
 newContact=contact.copy()
 newContact.selectChild(‘company’).text=data[i].company
 newContact.selectChild(‘name’).text=data[i].name
 newContact.selectChild(‘userpic’).image=Utils.randomImage()
 newContact.y=newContact.height*(i+1)
Of course, we can use copy function and arrays for simple things. But if we want to add more interaction to our components — add event listeners, states, animations and so on — it’s time to use classes.
In case you are new to this thing, here are a couple of useful links:
Official guide by Framer team
and proper article by Øyvind Nordbø
Classes, Loops and Arrays in Framer
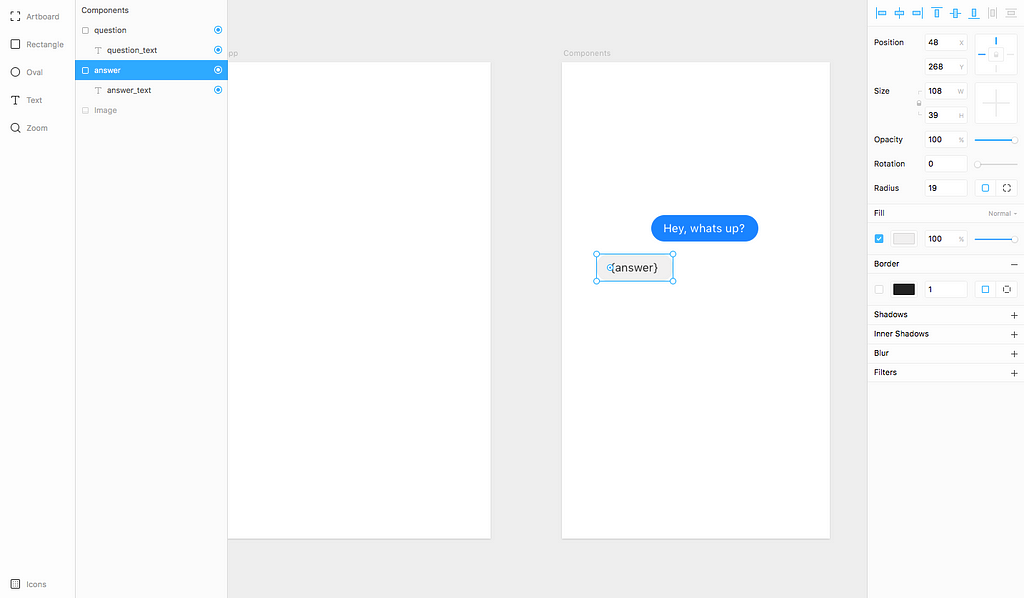
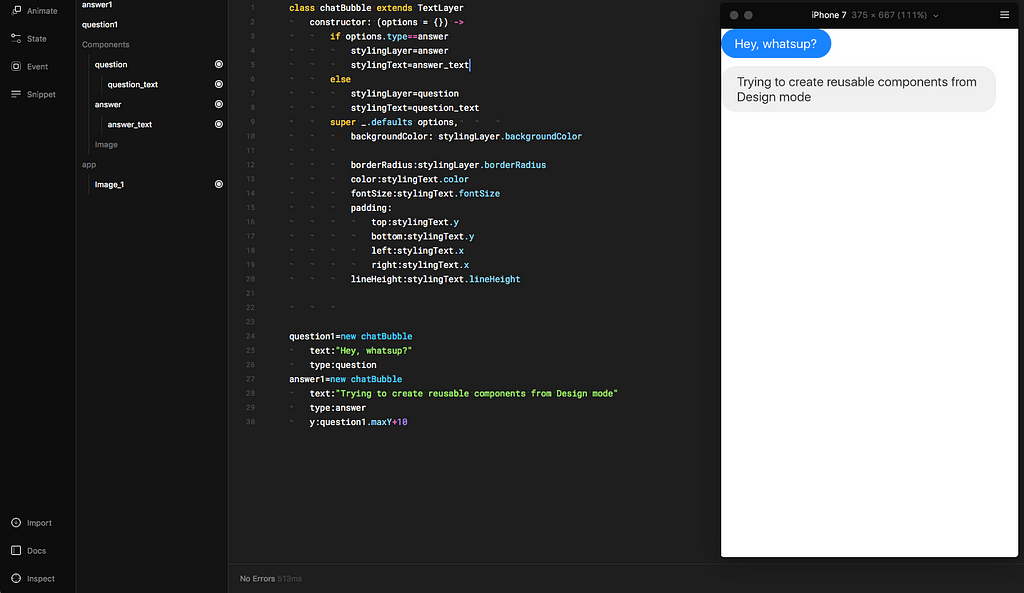
For example you are working on chat app, and designed your chat bubbles in design mode , set up border-radius, background, paddings, font-sizes and so on. Now you need to go dynamic from that. You can create class for chat bubble that will read certain properties from your Design mock in Framer.
class chatBubble extends TextLayer
 constructor: (options = {}) ->
 if options.type==answer
 stylingLayer=answer
 stylingText=answer_text
 else
 stylingLayer=question
 stylingText=question_text
 super _.defaults options,
 backgroundColor: stylingLayer.backgroundColor

 borderRadius:stylingLayer.borderRadius
 color:stylingText.color
 fontSize:stylingText.fontSize
 padding:
 top:stylingText.y
 bottom:stylingText.y
 left:stylingText.x
 right:stylingText.x
 lineHeight:stylingText.lineHeight
question1=new chatBubble
 text:”Hey, whatsup?”
 type:question
answer1=new chatBubble
 text:”Trying to create reusable components from Design mode”
 type:answer
 y:question1.maxY+10
So if u change something in design mode — your prototype will be updated automatically.
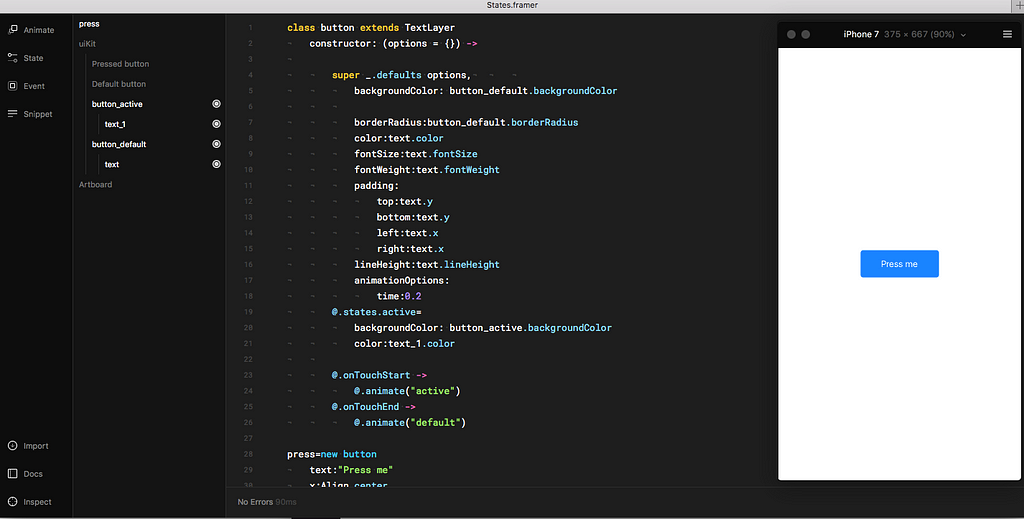
Here is another approach for this problem suggested by Callum Boddy
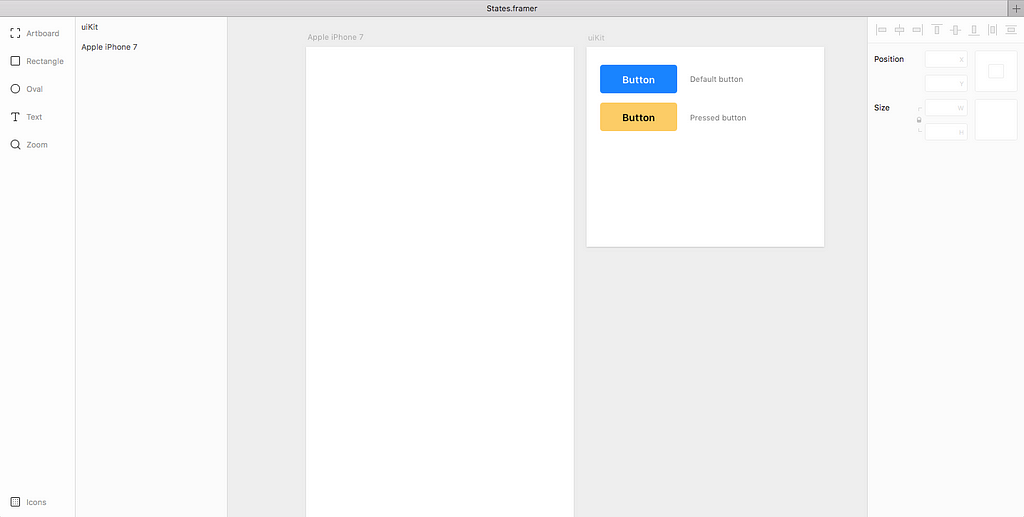
If u have UIkit in Framer Design, you can use states you defined in design to be attached to your class in code.
class button extends TextLayer
 constructor: (options = {}) ->

 super _.defaults options,
 backgroundColor: button_default.backgroundColor

 borderRadius:button_default.borderRadius
 color:text.color
 fontSize:text.fontSize
 fontWeight:text.fontWeight
 padding:
 top:text.y
 bottom:text.y
 left:text.x
 right:text.x
 lineHeight:text.lineHeight
 animationOptions:
 time:0.2
 @.states.active=
 backgroundColor: button_active.backgroundColor
 color:text_1.color

 @.onTouchStart ->
 @.animate(“active”)
 @.onTouchEnd ->
 @.animate(“default”)
press=new button
 text:”Press me”
 x:Align.center
 y:Align.center
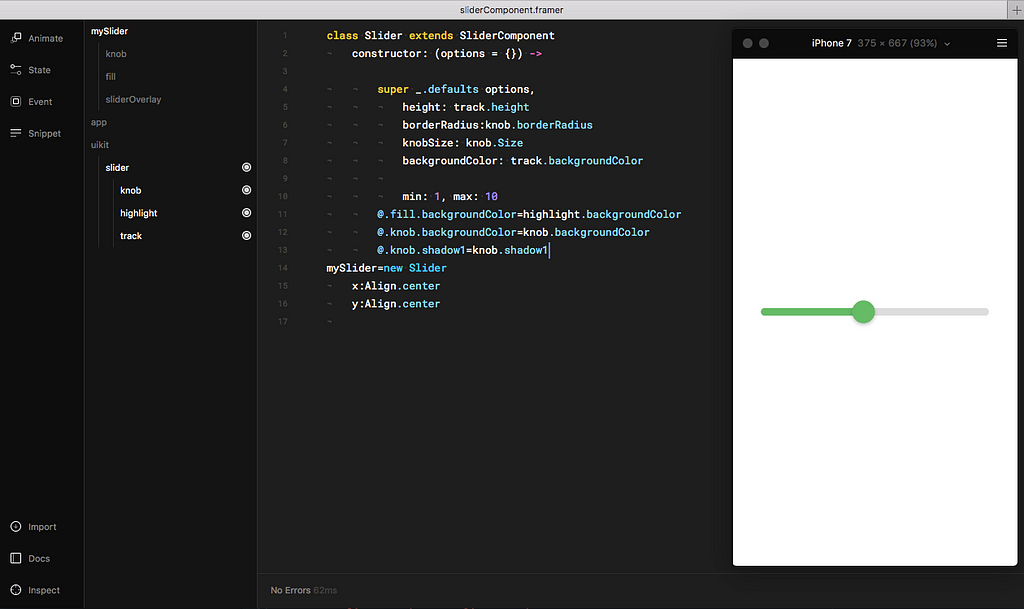
One of the interesting cases of creating reusable components from Design mode is the styled slider.
class Slider extends SliderComponent
 constructor: (options = {}) ->
super _.defaults options,
 height: track.height
 borderRadius:knob.borderRadius
 knobSize: knob.Size
 backgroundColor: track.backgroundColor

 min: 1, max: 10
 @.fill.backgroundColor=highlight.backgroundColor
 @.knob.backgroundColor=knob.backgroundColor

 #u can put here individual properties like shadows and borderradius of knob for example, if u are going to change that
 @.knob.shadow1=knob.shadow1
mySlider=new Slider
 x:Align.center
 y:Align.center
I think spending time on reusable components makes sense if you are working on long projects and have UI kits in place, or if you are using JSON data for example that you want to test with your Framer designs.
In most cases, people prototype small several screen interactions, which doesn’t require going crazy and coding components and just drawing everything in Design mode like in Fiber kit for example.
Came across amazing module by Lukas Guschlbauer that does most of the things I described
Happy to recieve any feedback and suggestions.
P.S. If anyone hiring interaction designer in UK or remote — let me know, need fresh challenge:)
Reusable components from Design mode in Framer was originally published in Framer on Medium, where people are continuing the conversation by highlighting and responding to this story.
AI-driven updates, curated by humans and hand-edited for the Prototypr community


