On to the Redesign
Current Information Architecture (IA)
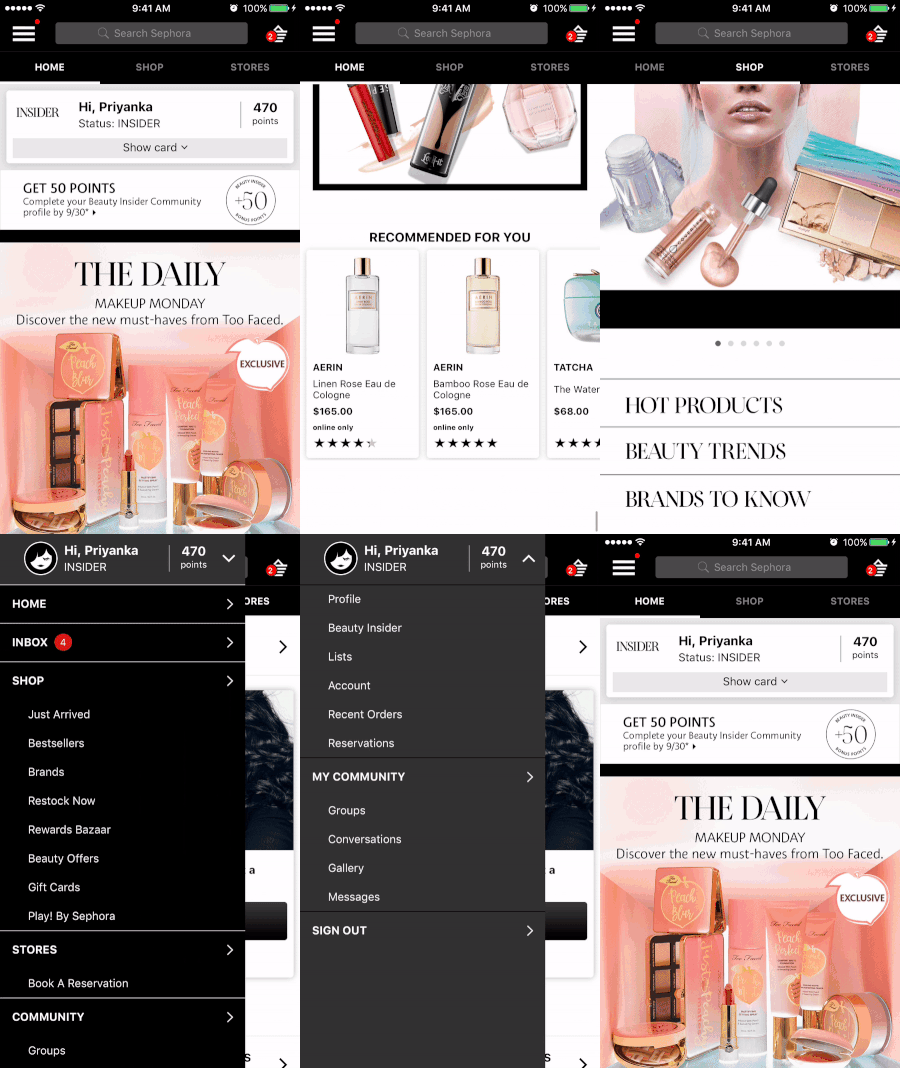
Most users were having trouble navigating through the current app. Therefore, in order to redesign the app, I built the information architecture to understand its structure.
Current Information Architecture
Revised IA
The newly designed IA increases the visibility of the app’s key features and improves the overall organization and navigation throughout the app.
Revised Information Architecture
Ideation & Paper Prototyping
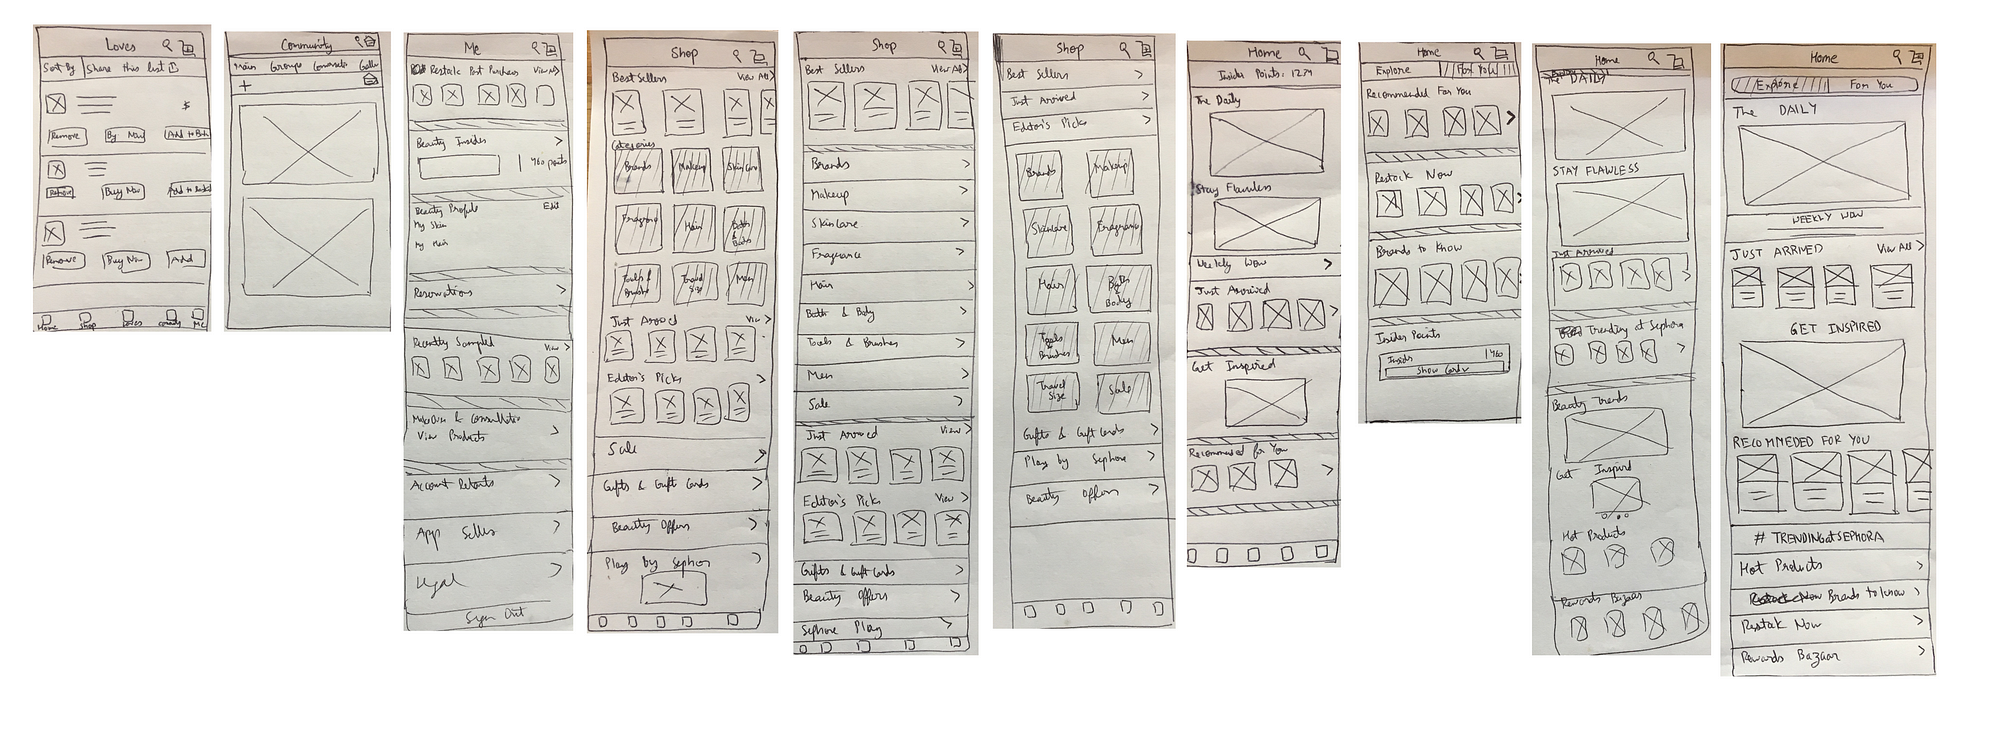
I scoped out Sephora’s competitors and other shopping apps and made observations on which layouts worked best. I sketched out possible solutions on paper for the main screens before committing to high fidelity designs. This allowed me to prototype different layouts rather than focusing on design details.
UX Suggestions & Redesign
Experience#1: Home
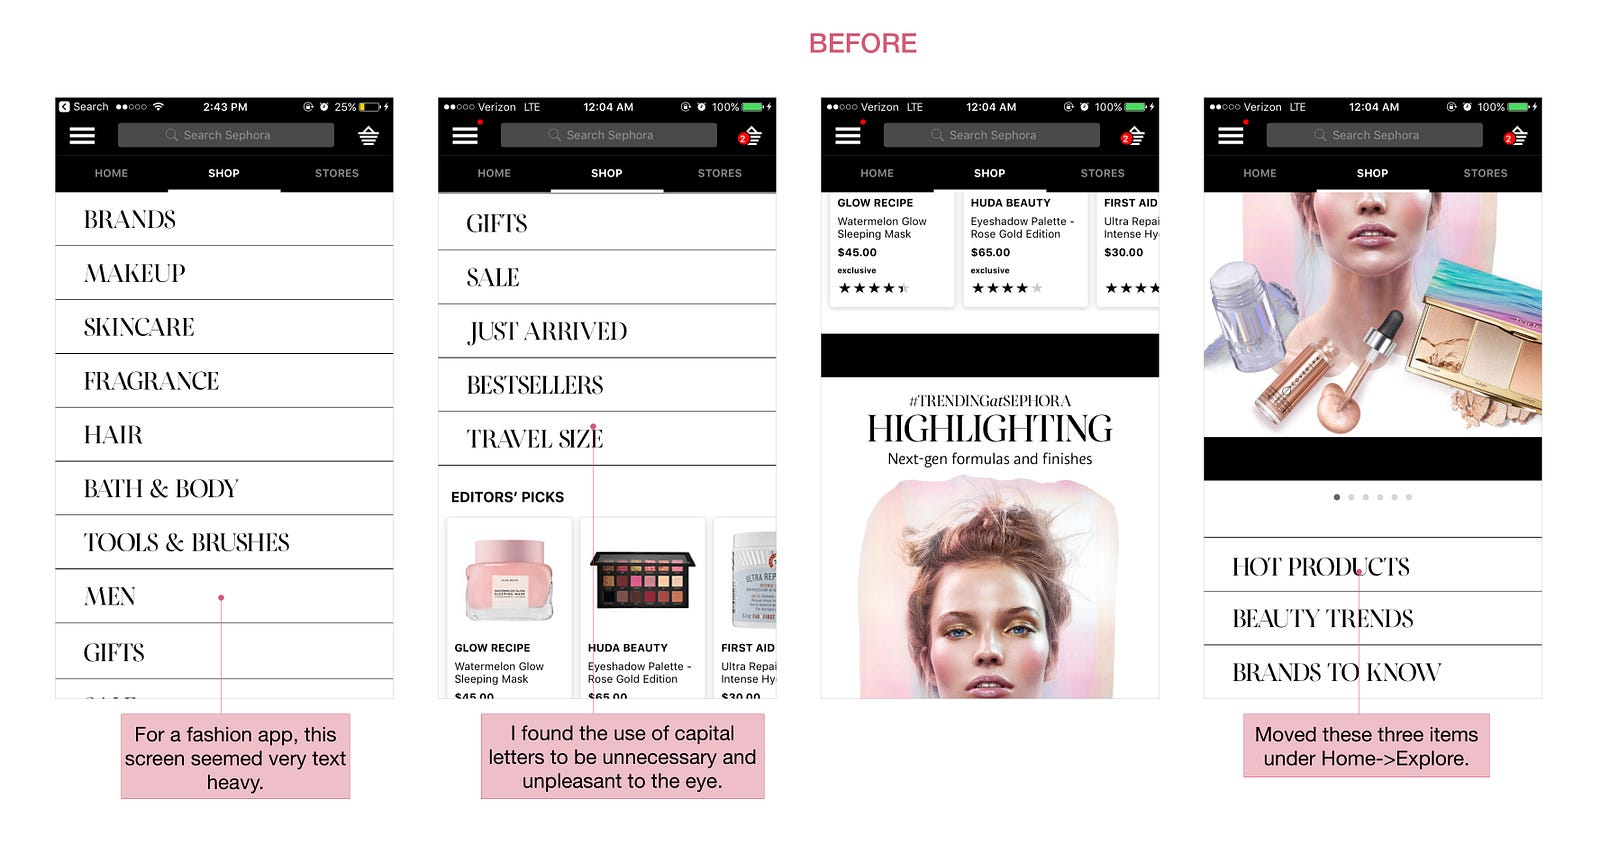
Currently, the app uses a hierarchical navigation model and a hamburger menu for navigation. Since hamburger menus make features undiscoverable, I replaced it with a tab bar. I also separated the Home screen into two parts: “Explore” lets users find new items and “For You” allows users to quickly restock past purchases, see personal recommendations, etc.
Home-Before
Home-After
Experience #2: Shop
I placed an icon for the Shop section of the app into the tab bar for quicker access. Within this section, I placed a segmented control tab above (“Shop” and “Stores”). The “Shop” segment within this Shop section is where the user can purchase items by categories, as well see Editor’s Picks and Beauty Offers. Since the world of beauty and fashion is so colorful, I focused on making the “Shop” segment visually significant without losing the amount of content the user can see per scroll. A critique I had of my redesign was the redundancy of the word “Shop”- the screen and the segmented control tab share the same title.
Shop-Before
Shop-After
The other segment of the Shop section is Stores. This section contains everything related to a user’s in-store experience.
Shop-Stores
Experience #3: Loves
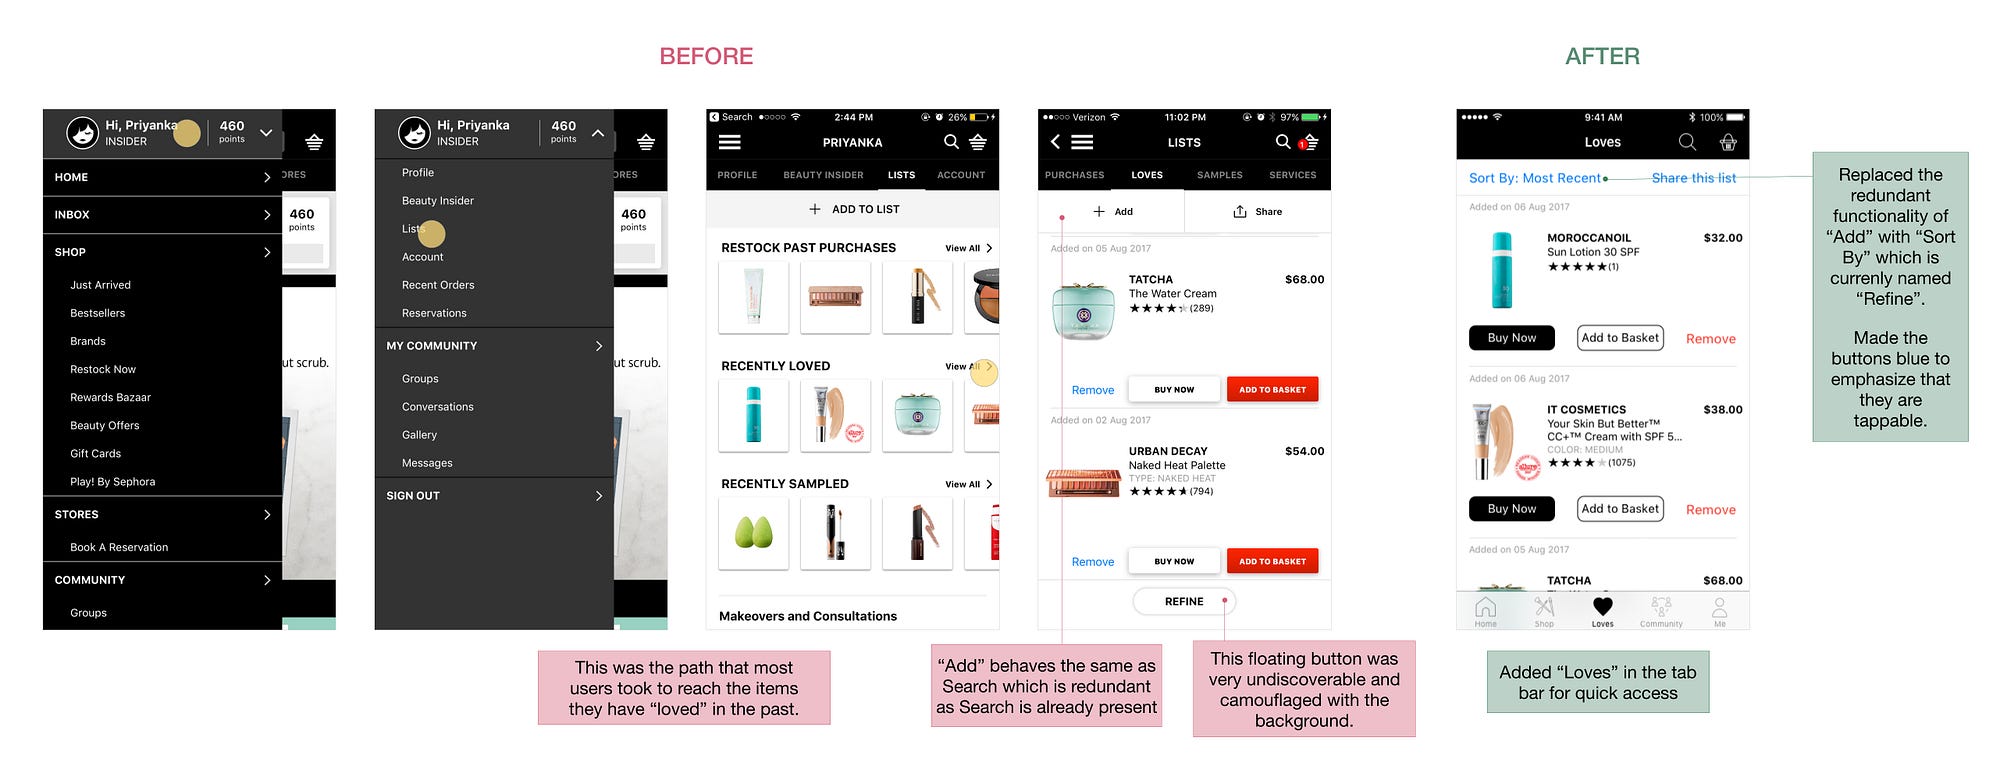
Sephora provides a way for users to “love” an item, essentially marking the product as a favorite. I found it quite easy to “love” an item but hard to find the aggregate list of “loves” later. This led me to place my list of “Loves” directly in the tab bar. From a business perspective, it makes sense to provide quick access to this as you would want the user to buy the items they marked as “loves” as soon as possible. However, the current placement promotes an “out of sight, out of mind” user behavior.
Experience #4: Community
During the usability testing, some users brought up that they appreciated having a community of people with similar interests and concerns. This led me to place Community in the tab bar. This was the extent of my modifications to “Community” as I had to limit the scope of my redesign.
Community
Experience #5: Me — My Profile
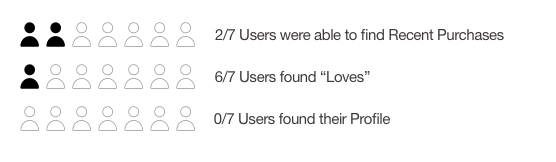
Finding the profile page was a major pain point for participants of the study. This section contains a list of recent purchases, items recently sampled, among other things. These options are important to the users because they are more likely to repurchase past products than buy new ones. The profile section was hidden in a dropdown within the hamburger menu. To increase its discoverability, I placed a “Me” tab in the tab bar. In addition, I divided this tab in two sections — “My Profile” and “App Settings” to provide a distinction between these two pages.
Experience #6: Me — App Settings
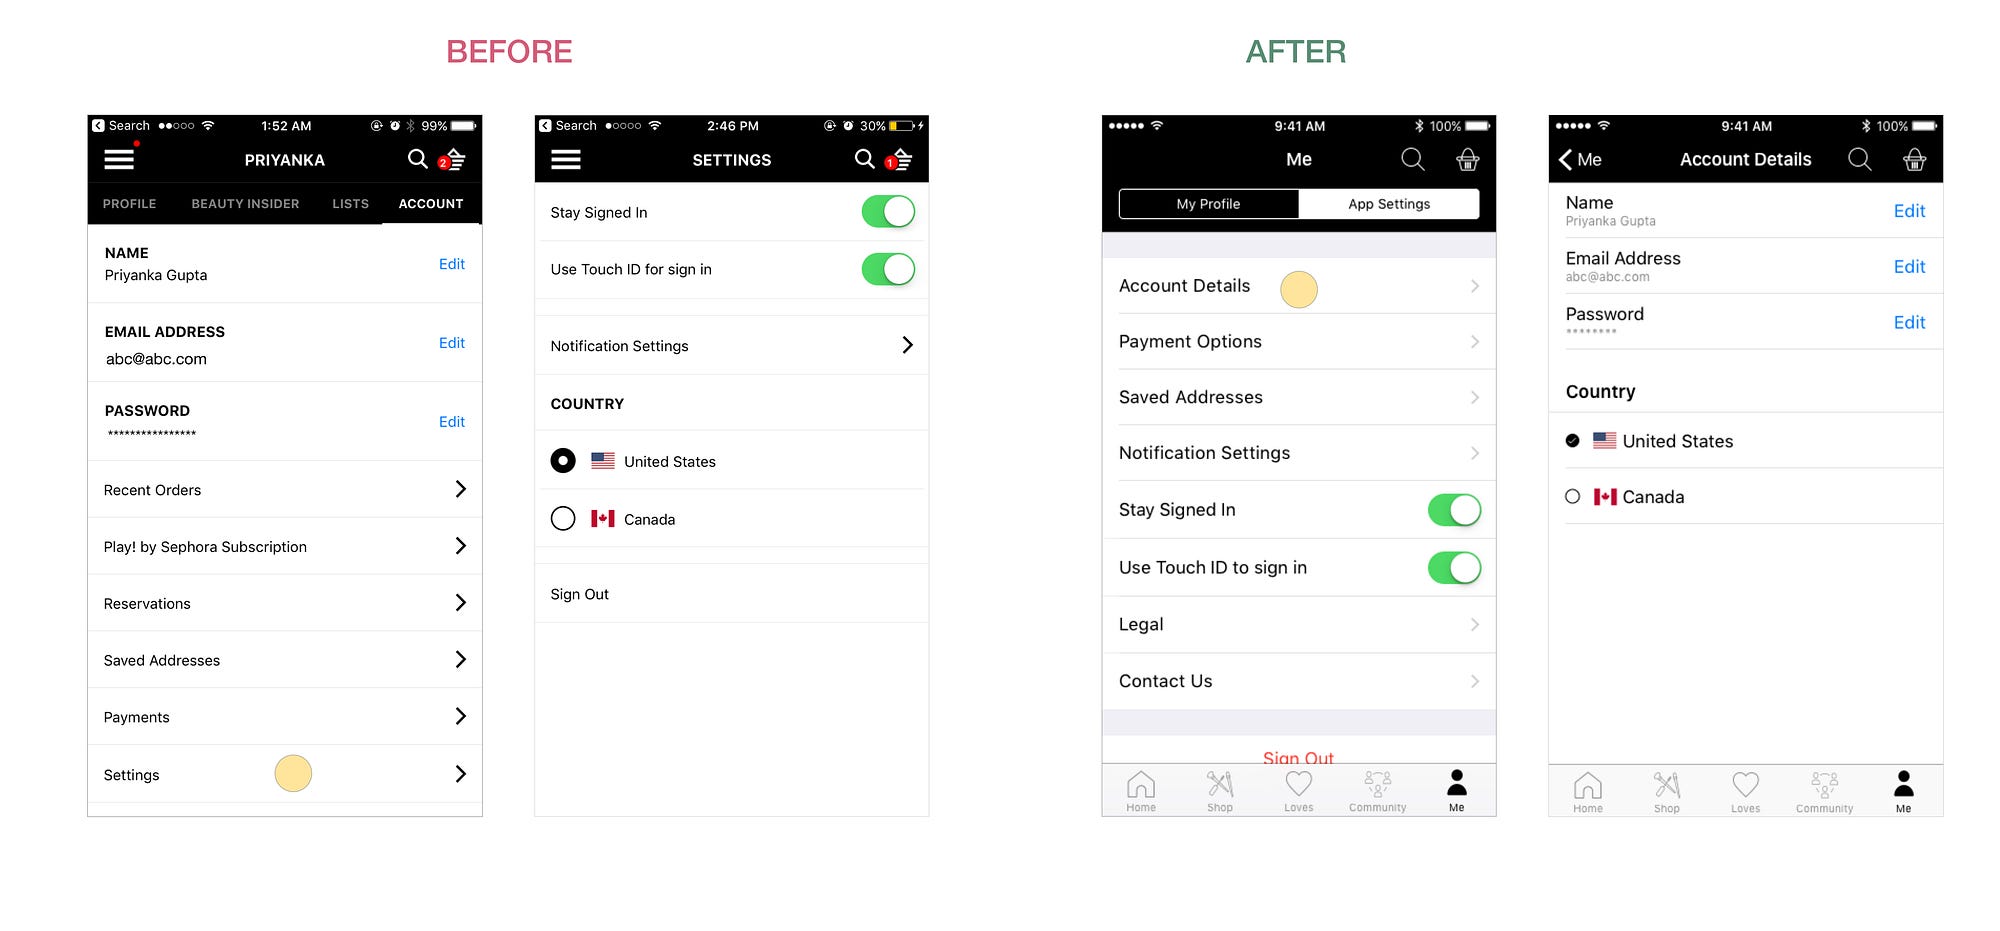
As I mentioned above, I reorganized the information related to app settings and categorized it.
App Settings
Experience#7: Account Details
Experience #8: Payment Options
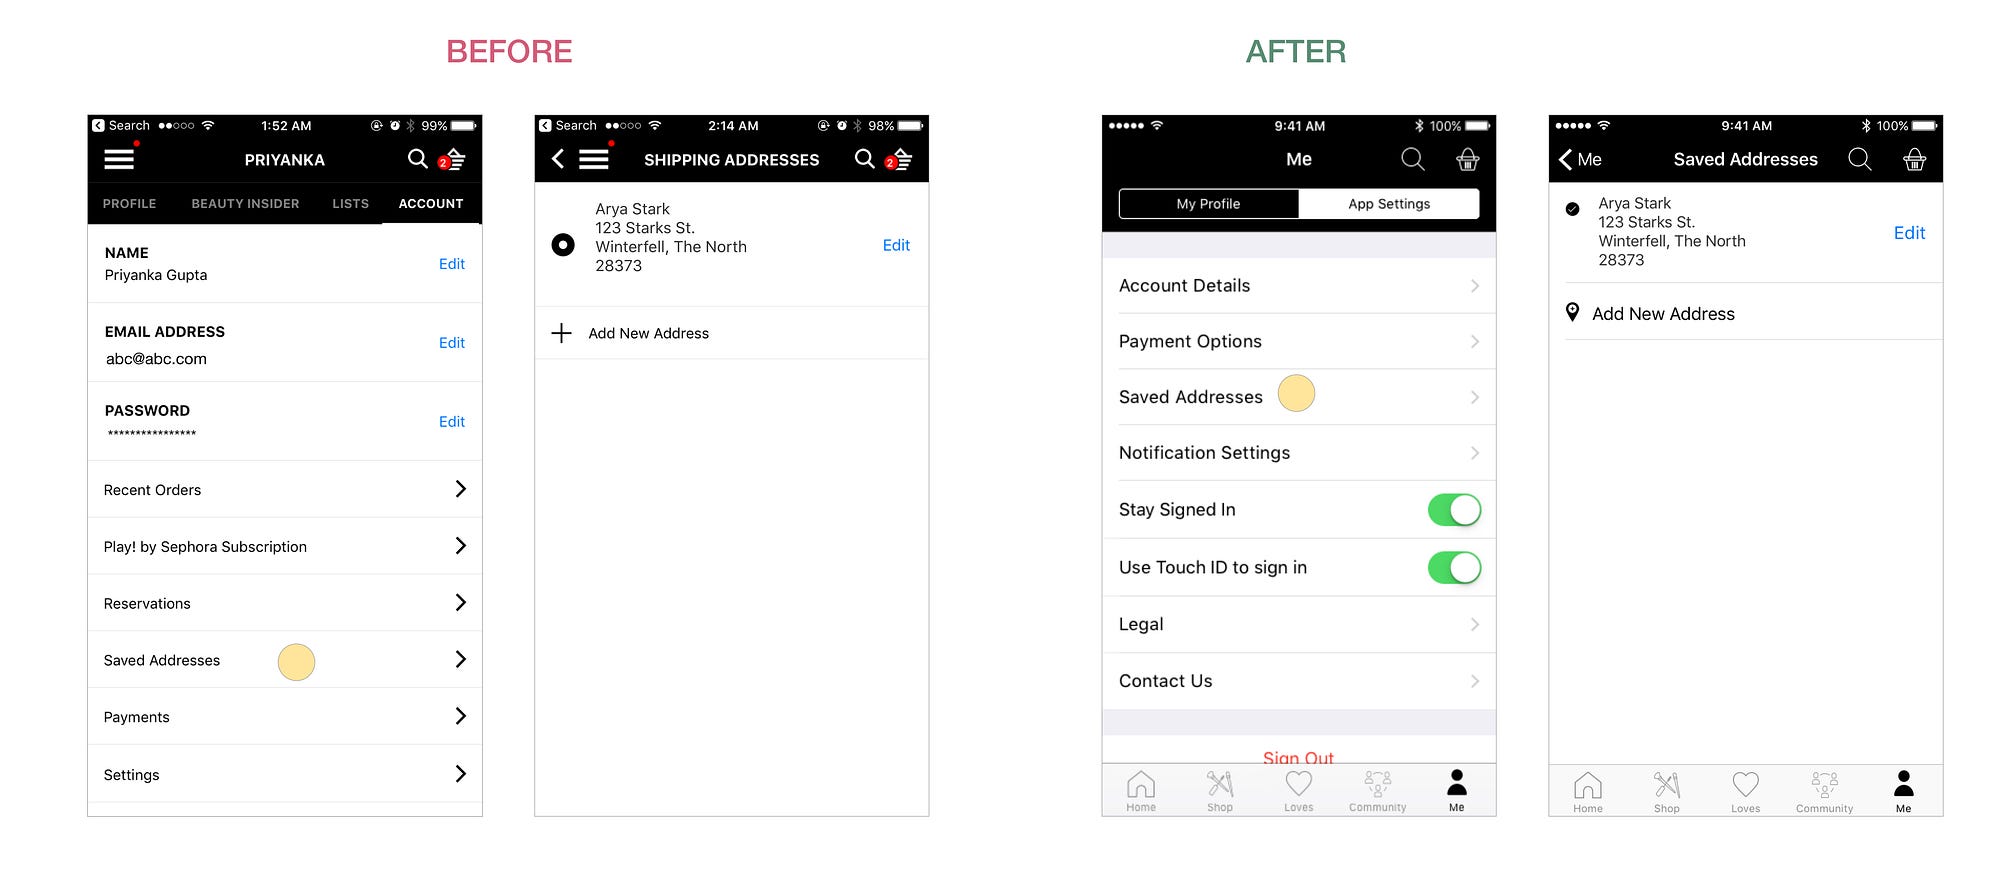
Experience #9: Saved Addresses
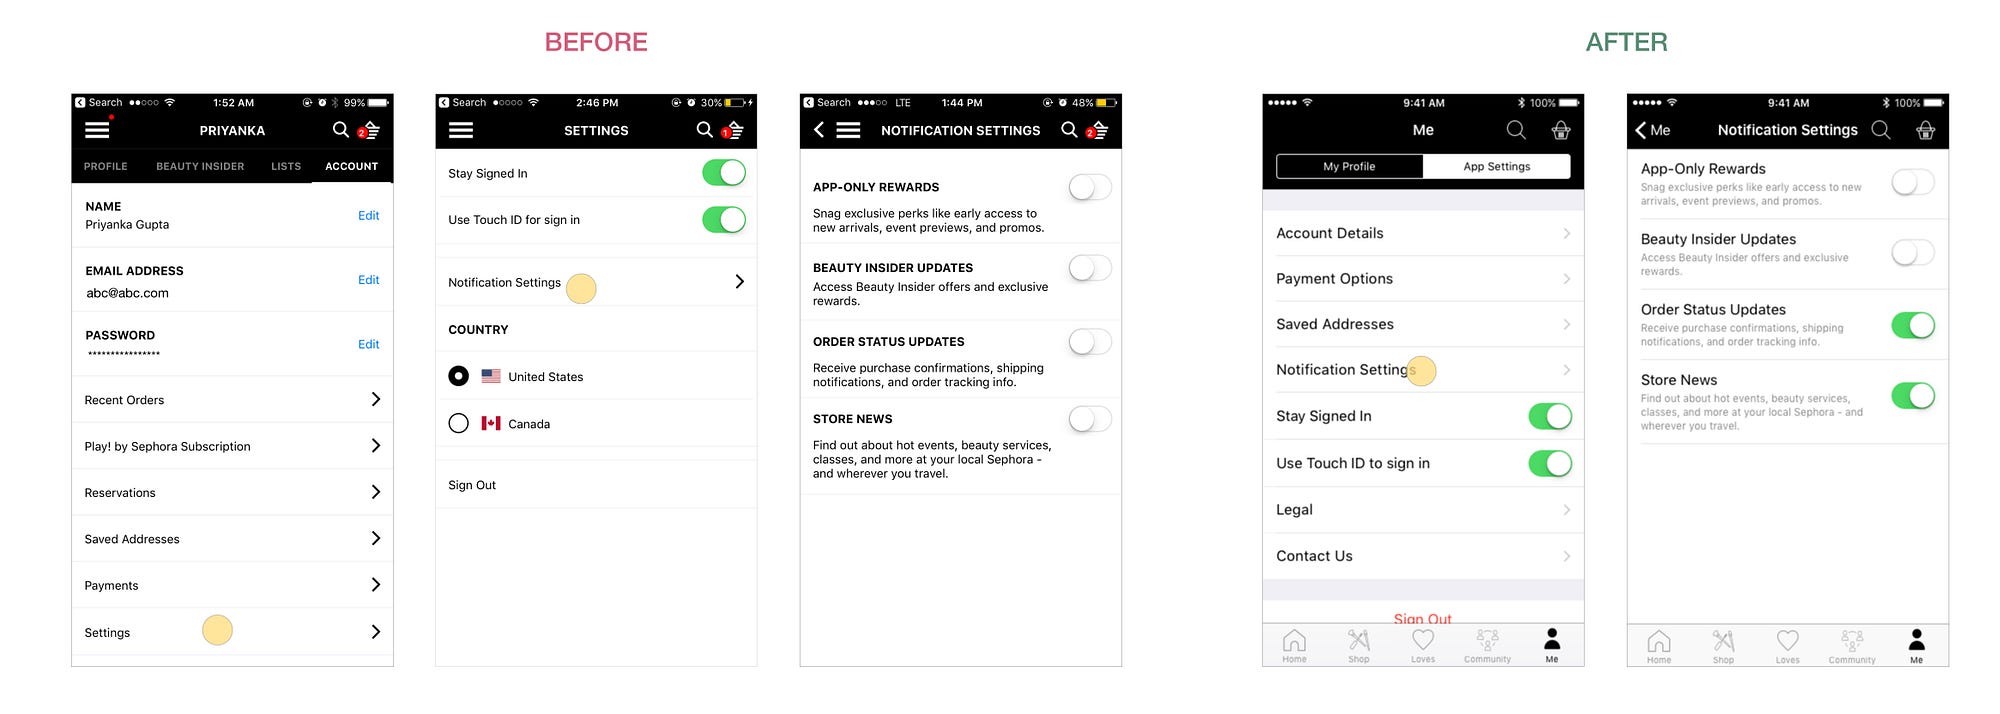
Experience #10: Notification Settings
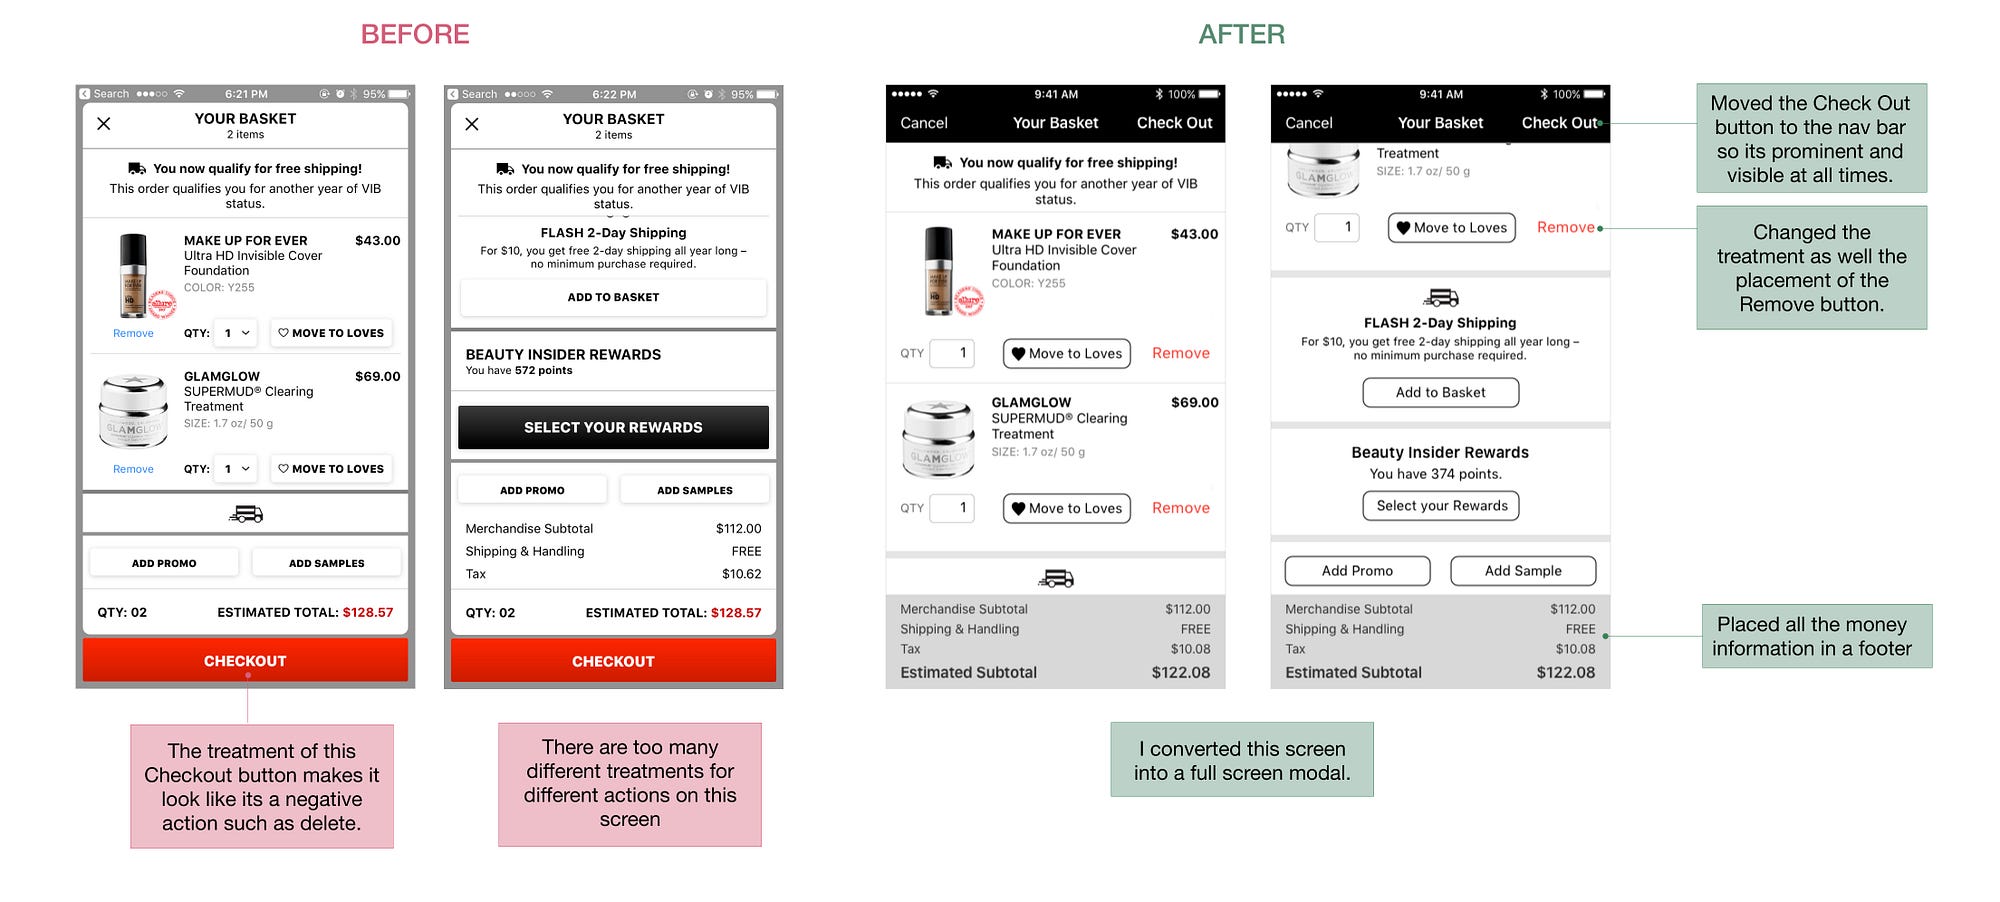
Experience #11: Your Basket
On this screen, users can view all the items that are in their basket before purchasing. I gave the items on this screen a visual makeover for coherency. Previously, the buttons were inconsistent in size and color. The action sheet here was also not being used appropriately as per the Human Interface Guidelines so I changed it into a fullscreen modal.
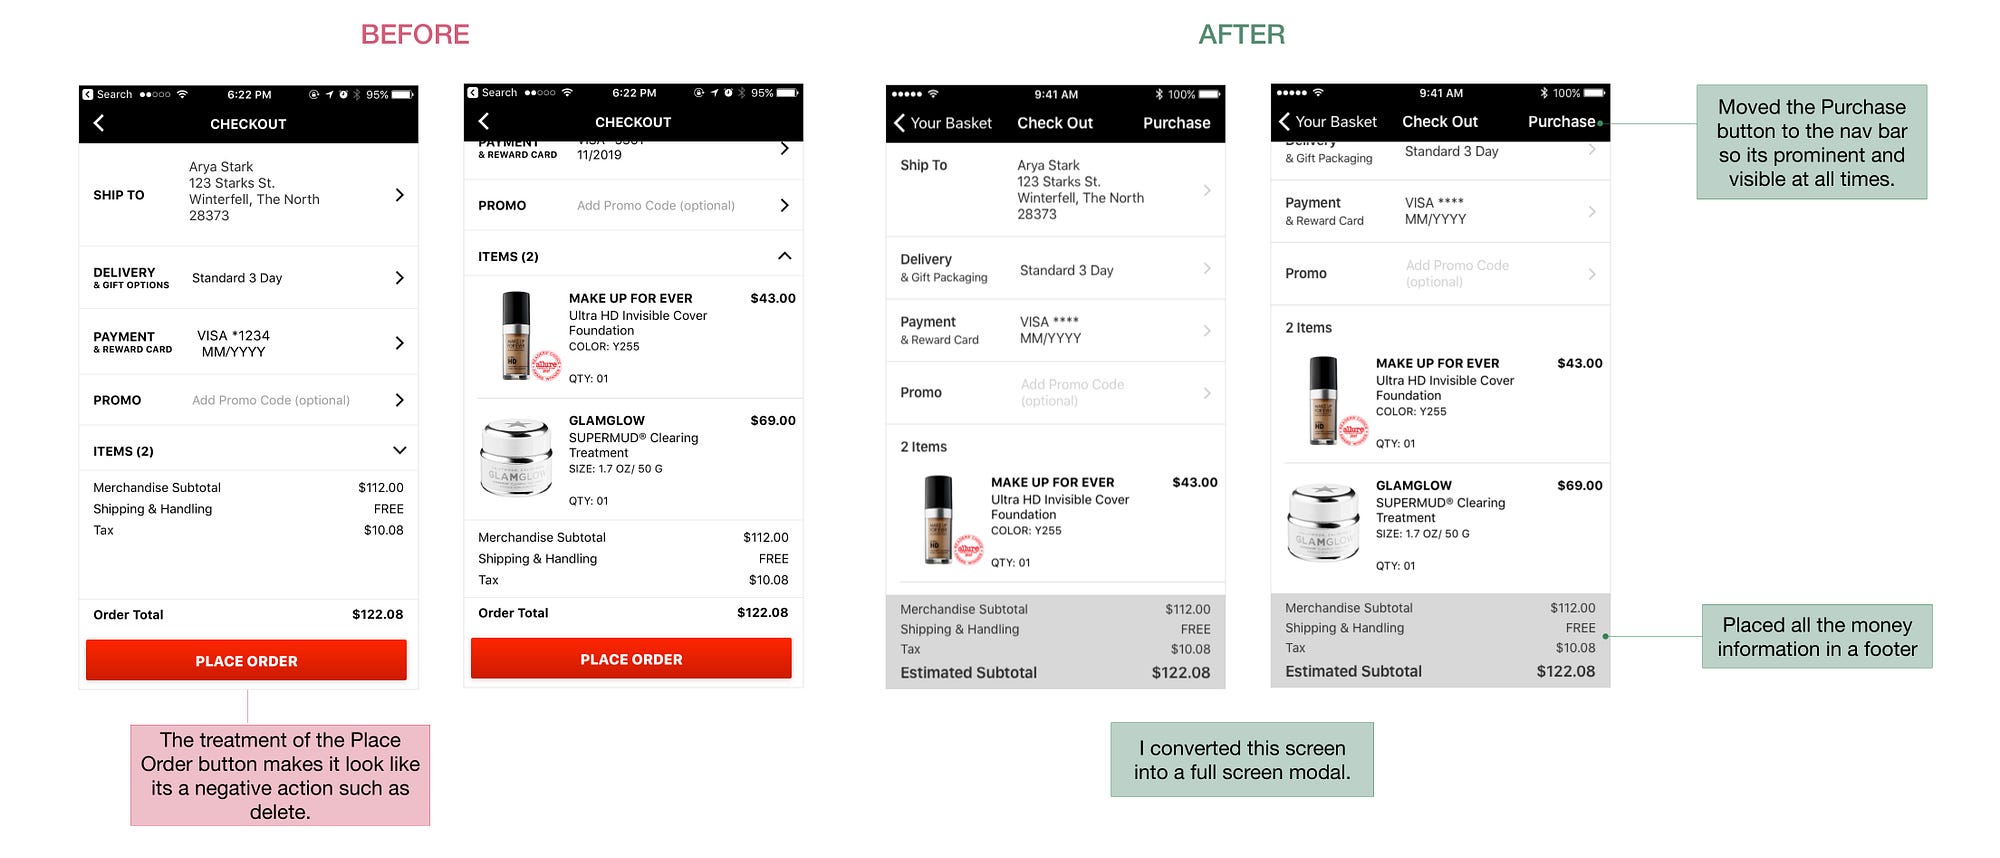
Experience #12: Checkout
Similar to the screen above, I made some visual enhancements on this screen.
Functional Prototyping
I used Marvel to create a functional prototype of all the screens. Check it out here.📱📲
Validation Testing
To validate the changes I made, I surveyed users at the Sephora store with my prototype. I asked the same questions from my initial tests and recorded their behavior and feedback.
Here’s what people had to say about the redesign:
“Did you make this app? This is great.”
“I like this better.”
“‘Me’” seemed more obvious.”
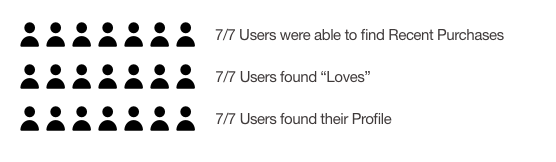
Results from validation testing:
As a result of the redesign, the success rate for tasks increased to 100%.
Reflections on my work here
I was both excited and nervous about this project — excited because I was doing something I love and nervous because I knew this was going to be a lot of work. Despite my fear and nervousness, I knew this was the perfect opportunity for me to hone my design skills by making my way through the messy design process. Working on these projects frequently reminds me of the adage:
“People ignore design that ignores people” — Frank Chimero
I had a blast doing this project and I hope you enjoyed reading about it too. Be sure to 👏🏽 below and leave comments and suggestions. If you think I did something well or something I can improve on, I would love to discuss it in the comments. Thank you for reading!